Tuesday 7 April 2015

Dungeon Orders: A Link to the Past (SNES)

Here's where we start to get into the bigger challenges of this blog: The Zelda games become more linear, but the glitches become greater in number, and it can be hard to make sure that we leave no stone unturned. Regardless, it's always possible that I miss something, whether obscure or obvious, so feel free to leave a comment if you notice something that I didn't.

First, before anything else, let's again define what it means to complete a dungeon. Firstly, you must collect the inventory item in the dungeon. Secondly, you must defeat the boss of the dungeon (defined as the enemy that drops a heart container in the boss room, as shown by the compass). Thirdly, you must collect the Pendant or Crystal at the end of each dungeon. And as always, you must do all of this in one trip unless the game requires you to leave the dungeon in order to complete it (which it does in the Desert Palace and in Skull Woods). This is to prevent you from simply going deep enough into a dungeon to take the item from it, and then leaving to complete another dungeon with that item.
    As a matter of necessity, Lower Hyrule Castle, Upper Hyrule Castle, and Ganon's Tower have different criteria for completion since they do not have Pendants, Crystals, or comparable bosses. To complete Lower Hyrule Castle, you must collect the Boomerang, defeat the Ball & Chain Trooper that drops the Big Key, and bring Zelda to the Sanctuary. To complete Upper Hyrule Castle, you must simply defeat Agahnim. And to complete Ganon's Tower, you must collect the Red Mail and defeat Agahnim again.

Before we take a look at the dungeons in this game, we need to understand a bit about how the game overworld changes as you make progress. There are four 'phases' of the overworld that the game moves through.
  • Phase 0: From the beginning of the game until you get a sword and shield from your uncle.
    • Even if you somehow collected a sword before seeing your uncle in the castle (whether by hacking or glitches), you will not be able to use it.
    • You cannot save the game while in phase 0.
    • Zelda's telepathic message appears on-screen once every minute.
  • Phase 1: From finding your uncle in the castle basement until you bring Princess Zelda to the Sanctuary.
    • If you save and quit or die, depending on how far you've gotten in Lower Hyrule Castle, you can restart at the place you found your uncle, the main doors of the castle, Zelda's cell, or the room leading to the Sewer Passageway.
    • If you could get past the guards blocking the exits from the Hyrule Castle area and Link's House, you would find that there are no other sprites in the entire overworld.
    • If you entered the Dark World somehow, you would find all of the Light World overworld sprites there.
  • Phase 2: From rescuing Zelda until you defeat Agahnim in Upper Hyrule Castle.
    • If you save and quit or die, depending on how far you've gotten in the game, you can restart at Link's House, the Sanctuary, or the old man's cave on Death Mountain.
    • Sprites appear properly on the maps.
  • Phase 3: From beating Agahnim in Upper Hyrule Castle, lasts for the remainder of the game.
    • The gates to Upper Hyrule Castle and Lower Hyrule Castle will be permanently closed for the rest of the game.
    • The gate to the castle will become a warp to the Dark World.
    • A. Bumpkin and B. Bumpkin (the lumberjacks) will have finished cutting down the tree and disappeared.
    • Some enemies are replaced by stronger versions (for example, Toppo stops appearing near the Swamp Ruins, and the Red Soldiers begin appearing around Hyrule).
So there are a hell of a lot of glitches we'll need to take a look at.

GLITCH TIME!

There are many important glitches in this game that we'll have to take a look at: The Exploration Glitch, Death Mountain Ascent, Dash Buffered Wall Clipping, Kiki Skip, Early Tempered Sword, Death Mountain Descent, Surfing Bunny, Ether Medallion Glitch, and the Phase 0 Escape Glitch. There are a few other relevant glitches, such as Yuzuhara's Bottle Adventure, Mirror Transitioning (to glitch into the Ice Palace and Turtle Rock early), Fake Flippers, and Hookdashing, but these all only work on the 1.0 Japanese version of the game, and therefore cannot be replicated on a SNES console, so we won't have to really consider them.

Let's take a look at one of the most famous glitches of the game first, the Exploration Glitch!

EXPLORATION GLITCH

'Jump and Save' method. Video taken from FlopMcblob's channel.

'Levitation Glitch' method. Video taken from doominagravyboat's channel.

(Note that there are two other methods of activating the Exploration Glitch, but they require pressing up and down at the same time, which is impossible on an unmodified SNES controller). So there's a lot happening here, so let's take a second to explain what's going on. The first thing to realize is that all of the underworld maps are connected to each other, as a necessity for programming. It's something that should never come up in regular play because you're theoretically stuck within the boundaries of the room, and therefore unable to access one underworld area from another.
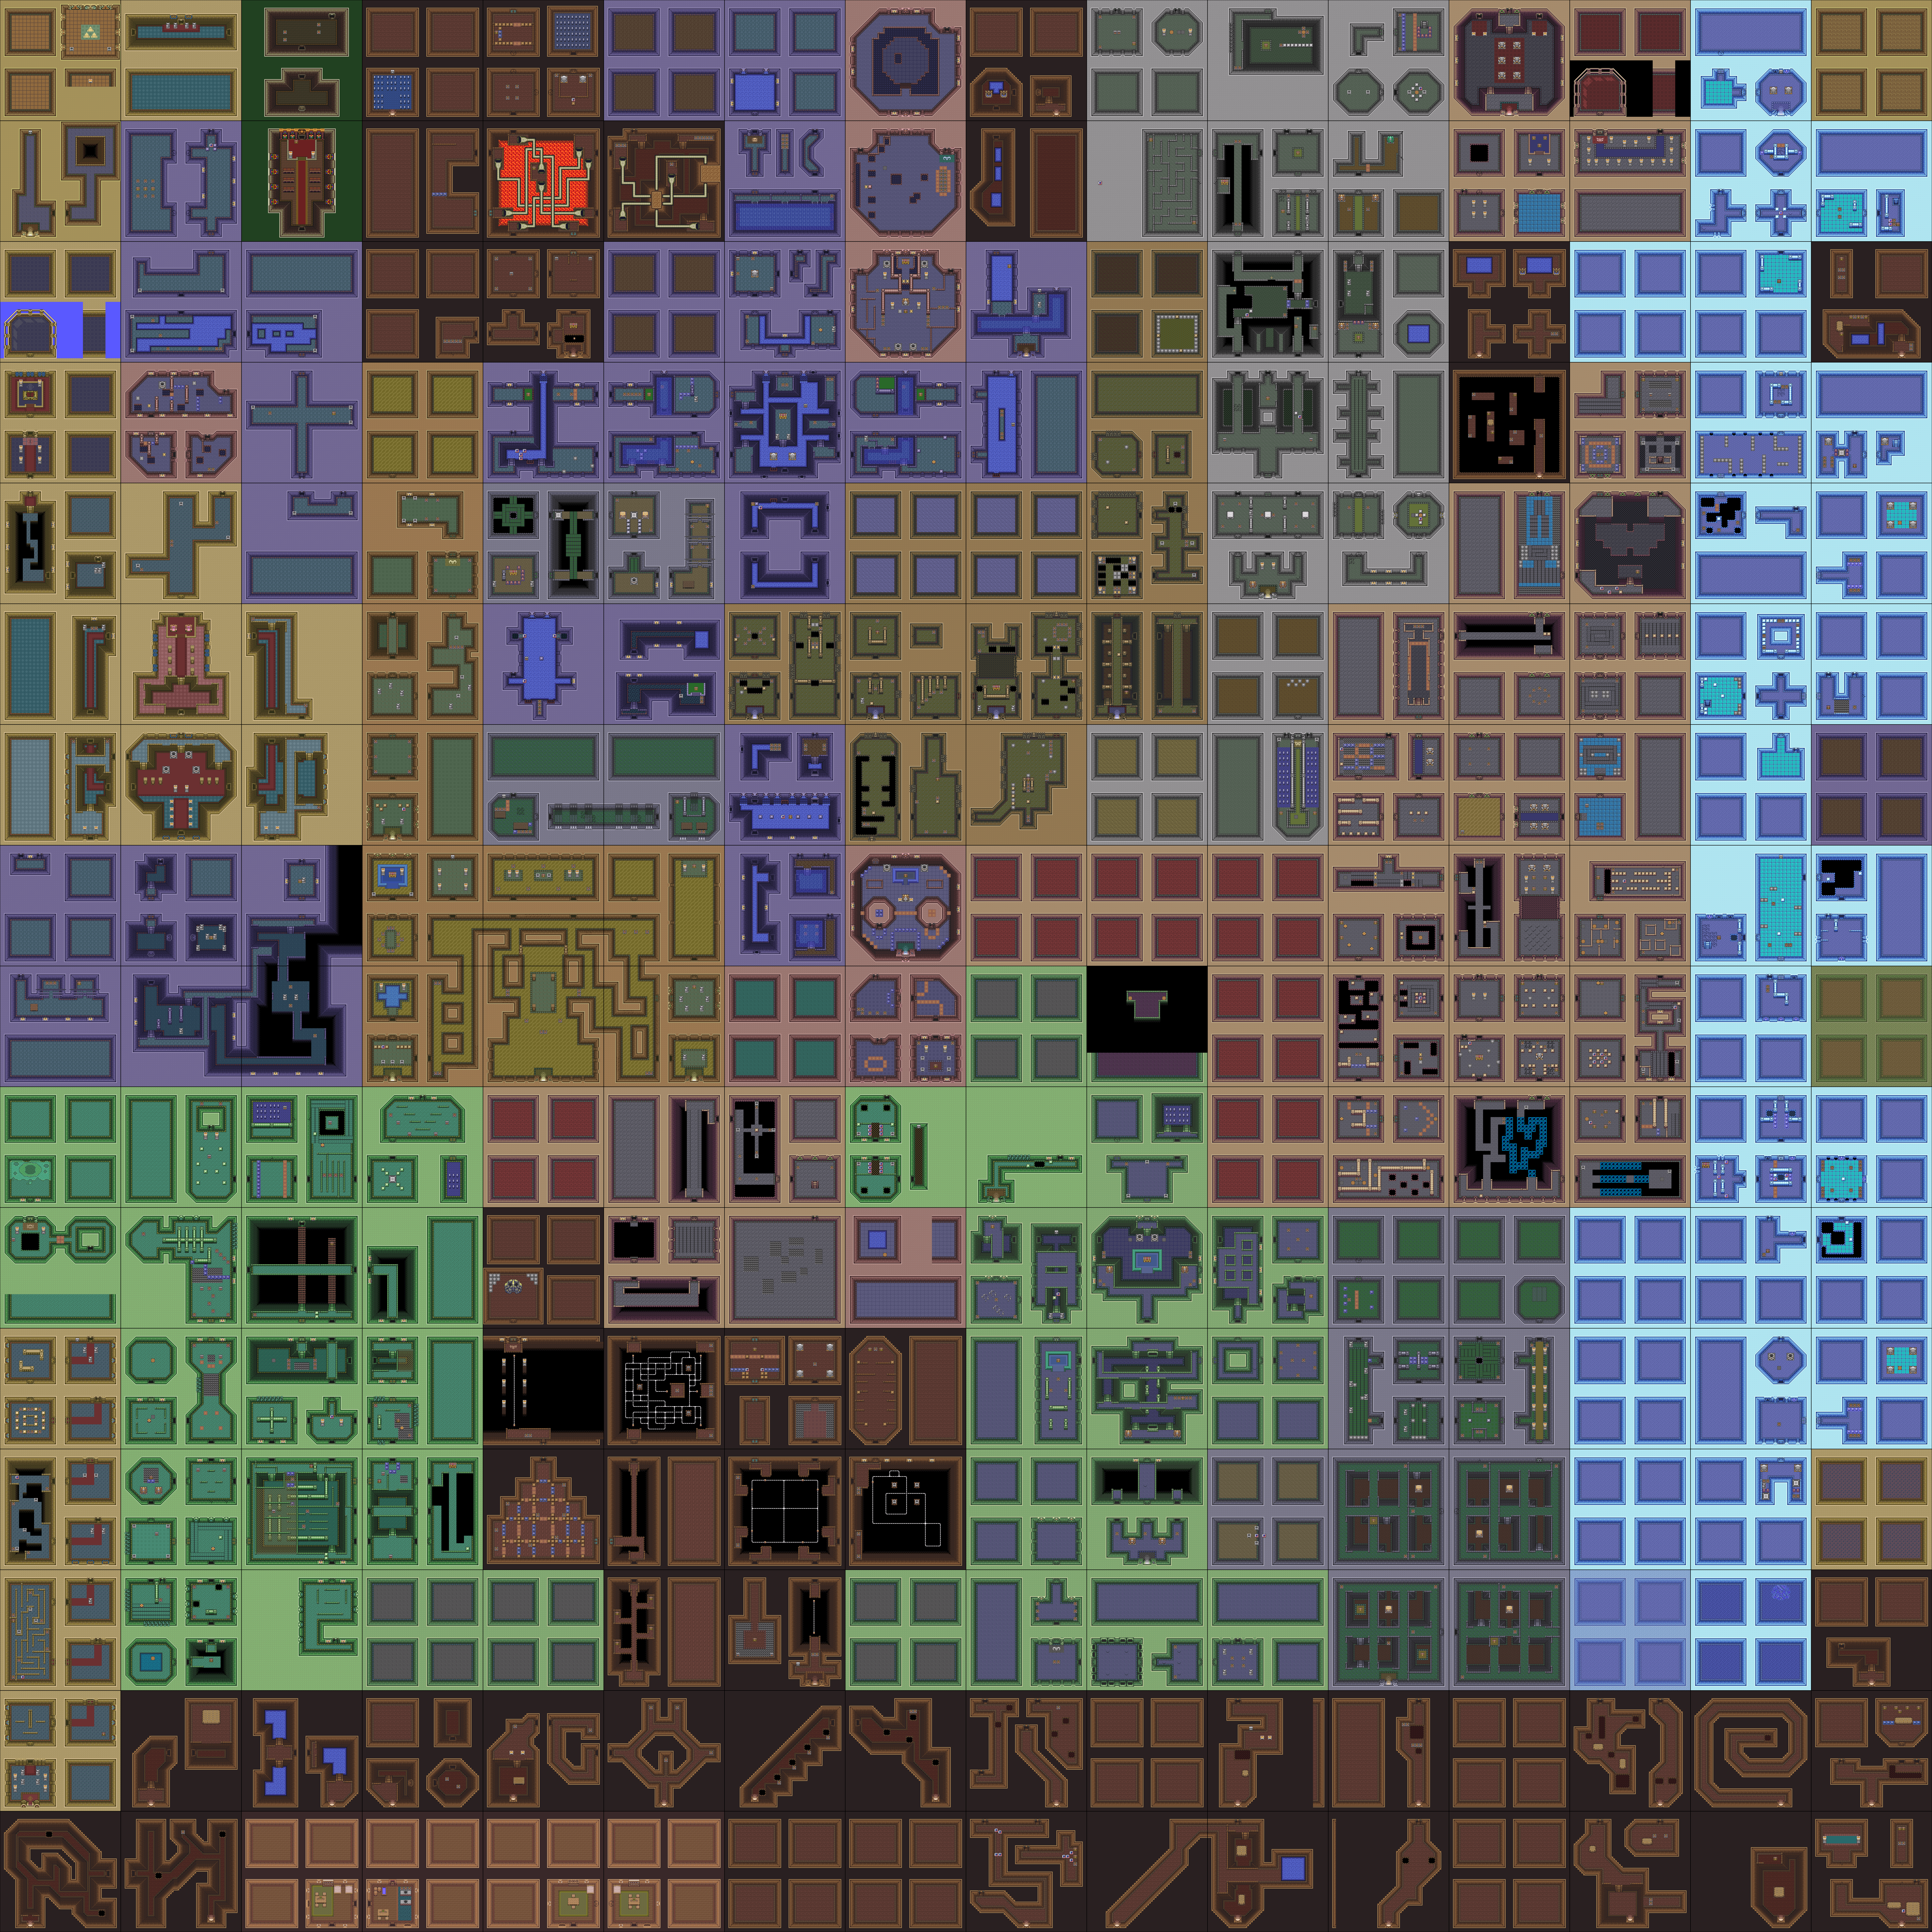
This is a HUGE map of every single underworld room in the game, and how they're connected in the game. Image taken from http://zanapher.free.fr Right-click to see the full size image.
Now, imagine if you were able to go outside the boundaries of one room, walking along the walls behind the collision detection of the game. Obviously, you'd be able to walk from one room to the next, even if they're not supposed to be connected! While you're in this state, you're considered to be in the Exploration Zone. There are a couple of ways to do this, as shown in the videos.

This game is divided into two different 'levels' so that you can walk underneath certain hallways and paths, depending on whether you're on the upper or lower level of the room. By using the Jump and Save method, you confuse the game and trick it into thinking that you're constantly in the 'jumping' state since you never landed. Then when you take damage, it tries to pull you out of the jumping state. And the game is programmed to realize that when Link leaves the jumping state, he's on the lower level, so it tries to put you on that level. If there is no standard floor on that part of the lower level, then you can walk around under the floor and along the 'outside' of the rooms.

The Levitation method generally requires a turbo controller, as it requires you to press the A button once each frame (roughly 60 times a second), but it can technically be done without one: Some speedrunners have mastered using the Levitation Glitch over very short distances. However, we're going to assume that it's virtually impossible to perform this glitch over long distances (such as is needed to perform the Levitation method Exploration Glitch) without a turbo controller.

Notice that the developers never thought to put a wall along the right side of this room, because they never expected players to be able to get there. That means that all you have to do is use the Levitation Glitch to get to the edge of the screen and you can simply walk into the next room, which puts you inside the Exploration Zone.

Unfortunately, much of the fun that the Exploration Glitch can do is not going to be useful to us, since you can't interact with the normal sprites (collect items, fight the boss, etc.) while you're on the level beneath them. There are only a handful of rooms where you can return from the glitched level of the Exploration Zone back to the regular level of the underworld map (this is referred to as 'hopping' and rooms in which you can do this are called, intuitively enough, 'hoppable' rooms).

DEATH MOUNTAIN ASCENT AND DASH BUFFERED WALL CLIPPING

Video taken from LTTP4HTTP's channel.

The Death Mountain Ascent glitch is the most common use of the Dash Buffered Wall Clipping glitch. Essentially, your goal is to tap the A button to prepare a dash with the Pegasus Boots and press up and right for exactly one frame, then do the same thing while holding down and right for one frame, and continue in this pattern until you're in the proper position (Alternatively, depending on where you do the glitch from, you can simply tap the A button and the right button for exactly one frame, and repeat this multiple times to get into the proper position).  Either way, you then walk to the right position and 'jump' down onto Death Mountain, which is located there on the overworld map, but is not supposed to be accessible from that screen. The game will be very confused about Link's position, so you'll have to maneuver a bit in order to find a cave entrance: Once you walk into a cave, the game reorients itself.

There are many other ways the Dash Buffered Wall Clip can be used: You can use it to get into the Swamp of Evil early, to skip some rooms in the Ice Palace, Misery Mire, and Mountain Tower, to get into the east of Death Mountain early, and to start the Kiki Skip glitch. To see how to use these Dash Buffered Wall Clips, check out speedrunner Kryssstal's website, http://notesmash.org/krystal/alttp/clips/.

KIKI SKIP

Directions on how to do the Kiki Skip glitch, taken from http://notesmash.org/krystal/alttp/
The Kiki Skip glitch is a somewhat special use of a Dash Buffered Wall Clip. The cave that you use it in (on a ledge on the side of Death Mountain) just happens to be on the very bottom of the underworld map: If you check the Exploration Zone map posted earlier, it's on the bottom row, seventh screen from the right. Conveniently, on the top row, seventh screen from the right, is a room from the Dark Palace. Maps in this games loop vertically and horizontally (you'd never notice this in standard gameplay since you should never get out of bounds like this), so Wall Clipping in this cave and jumping down to the next screen causes you to 'land' inside of the Dark Palace, skipping the need to have Kiki the monkey open it for you.

EARLY TEMPERED SWORD

Video taken from speedrunner Tompa's channel.

This glitch can be very helpful since it allows you to get the Tempered Sword even before collecting the Master Sword! If you use the Magic Mirror while in the Dark World at the exact same frame as you jump down from the cliff, the warp portal will move one pixel further each time you do this. After doing this three times, you can reach the ladder to the library while in the Light World with the portal just below you. Touching the very upper edge of the portal while on the ladder will move you a bit closer to the the transformed smithy, allowing you to eventually reach him without using the Titan's Mitt.

DEATH MOUNTAIN DESCENT

Video taken from Desbreko's channel.

This is one of the most famous glitches in A Link to the Past, and has been used for ages in speedrunning this game. The explanation for the glitch is given in the video. It's very important for us since it allows you to access much of the Dark World earlier than intended.

SURFING BUNNY

 
Images taken from the ZeldaChaosWiki, at http://www.jaytheham.com/zcw/Main_Page

In order to do this glitch, you must get to the Plains of Ruin in the Dark World with the Flippers but without collecting the Moon Pearl, which is easiest to do by using the Death Mountain Descent glitch. If you repeatedly move left while stepping into deep water (since in his bunny form, Link cannot swim even if you have the Flippers), you can trigger the screen transition while you're on the deep water. This will allow you to stand on the water, as seen in the first image. If you get killed by an enemy while standing on the water, but have a bottled Fairy, you'll be revived as normal Link, since the game is not programmed to revive bunny Link while in the water. This will last until you enter and then exit a cave or dungeon, or until you use the Magic Mirror. Either way, once you return to the Dark World, you'll be a bunny again.

This glitch can also be done in the Swamp of Evil, but you'll have to stand on the deep water by using a warp portal from the Magic Mirror instead of a screen transition.

Alternatively, if you die or save and quit while in a Dark World dungeon (since the Light World and Dark World dungeons are all on the same map), the game automatically assumes that you're human, and sets you back to human Link until you leave the dungeon.

ETHER MEDALLION GLITCH

This glitch is basically a side effect of the Exploration Glitch. Keep in mind that the game is programmed to drop a Heart Container after a boss is defeated, and then to drop the Pendant/Crystal corresponding to whatever dungeon you're in. But if you enter, for example, the East Palace dungeon and then use the Exploration Glitch to get at the Dark Palace map, the game doesn't know that you're no longer in the East Palace. So when you defeat Helmasaur King, it will still drop the Pendant of Courage instead of the first Crystal.

But what if you do the Exploration Glitch from Lower Hyrule Castle? Well, instead of a Pendant or Crystal, the prize for defeating a boss in this dungeon just so happens to be the Ether Medallion! Normally, we wouldn't be able to use this glitch, since it would require permanently defeating a boss before entering its dungeon, making that dungeon impossible to complete. However, if you go to a boss room of a dungeon that you have already completed, for some reason the Ether Medallion will still fall into the room, allowing you to collect it early!

PHASE 0 ESCAPE GLITCH

This is a very annoying glitch, to say the least. There are a few important facts to recognize about Phase 0 of the game. First, Princess Zelda's telepathic message will occur once every 60 seconds, but the time for her message will not count down while a text box is on the screen. Secondly, if you are holding an item above your head or tugging on a wall, the internal timer for her message will count down, but the message will not be displayed until you throw the item or stop tugging on the wall. Because of this, you can approach the guards that block your way to the east and get as close as possible to them (this will cause their text box to automatically open). Then, tug on the wall for at least a minute. When you let go of the wall, hold right and you will successfully move one pixel to the right before Zelda's telepathic message appears.

Now, once you close her message (assuming you're always holding right), the guard will automatically talk to you again since you're exactly one pixel too close to his dialogue trigger. Once you close his dialogue, it'll open one frame later since you're still within his trigger, as long as you're holding right. Since one frame passes in between each of his text boxes appearing and there are 60 frames in a second in this game, after 3600 of his text boxes appear (a total of one minute worth of frames), Zelda's telepathic message will reappear, allowing you to move one more pixel to the right. If you do this for about 20 hours, you'll have successfully moved enough pixels to the right to get past them and explore Hyrule during Phase 0! Of course, you cannot save any progress with the save and quit, and you cannot use any swords, meaning there isn't much use for this glitch to us.

ANALYSIS

There are a lot of possible glitches and a lot of dungeons in this game, so we're going to have to be
thorough with each one.

Lower Hyrule Castle is always the first dungeon you must enter, since all of the other paths are blocked off by guards. You could use the Phase 0 Escape Glitch to access other dungeons early, and you could technically complete East Palace without a sword, but the inability to save and the inability to return back to the castle (not to mention the dozens of hours this glitch requires) makes this impossible. And once you enter a dungeon, you must complete is, so we cannot use the Exploration Glitch to leave Lower Hyrule Castle while in Phase 1.

East Palace can be completed anytime after Phase 2 has started, as it has no special rooms that require items beyond the Bow.

Desert Palace can be glitched into with some Dash Buffered Wall Clips, but those require the Pegasus Boots, which means you'll have to have already completed East Palace anyway! While you could use the Exploration Glitch to enter it early, the only hoppable room in this dungeon is in the second half of the dungeon. This means that, since the boss is behind a big door and the Big Key is in the first half of the dungeon, you would not be able to fight the boss or reach the Power Glove (keep in mind that the entrance to the second half of the dungeon is blocked off by heavy rocks, so you can't exit it without the Power Glove). In other words, you must complete the East Palace before this dungeon, no matter what.

The Mountain Tower is more interesting: If you have the Pegasus Boots, you can enter it without the Power Glove by doing the Death Mountain Ascent glitch. However, once inside the dungeon, the Pegasus Boots, Bow, and Power Glove are never needed, and since you can the first room of this dungeon is hoppable, you can use the Exploration Glitch to get into here early. Simply hop into the first room and then walk out the door (this does not count as leaving the dungeon for the purposes of our definition for the same reason that completing a dungeon while in the Exploration Zone would not) and immediately walk back in so the game recognizes that you are in Mountain Tower (otherwise you would trigger the Ether Medallion Glitch and make completing this dungeon impossible).

Upper Hyrule Castle generally requires the Master Sword to enter, which would require the Pendants from completing the three Light World dungeons. Alternatively, you could use the Death Mountain Ascent glitch to get up to Death Mountain (which would only require the Pegasus Boots from completing East Palace or use of the Exploration Glitch to get through the Mountain Tower entrance), then the Death Mountain Descent to get to the Dark World's Village of Outcasts. From there, it's easy to make it to the smithy and use the Early Tempered Sword glitch to turn your sword into the Tempered Sword, which can also break the barrier leading into this dungeon!
    Because Agahnim is special, you can fight him normally even while the Exploration Glitch is active, but we won't accept that as completing this dungeon for the same reason we won't penalize using the Exploration Glitch as 'exiting' a dungeon: Being inside of a dungeon with the Exploration Glitch is not considered actually being inside that dungeon for the purposes of this guide. Regardless, you can make this your first dungeon after Lower Hyrule Castle by simply doing the aforementioned glitches to get the Tempered Sword before entering any new dungeons (aside from the Exploration Glitch to get outside of the Mountain Tower).

Dark Palace can be entered early with the Death Mountain Ascent and Kiki Skip glitches, and can be completed with only the Bow, which would be required to access the boss' room in this dungeon even if you used the Exploration Glitch. Without these glitches, you'd need to use the Death Mountain Descent glitch and a Dash Buffered Wall Clip to get to this dungeon early, you'd need the Flippers to get from the Death Mountain Descent spot towards the dungeon, and you'd have to have the Moon Pearl to get Kiki to open the dungeon for you (or to just have the Moon Pearl and complete Upper Hyrule Castle like normal).

Swamp Palace is a rather annoying dungeon, unfortunately. First of all, you absolutely need the Hammer and the Flippers in order to get through it (The former requires you to complete Dark Palace, the latter requires you to collect the Power Glove or Titan's Mitt to move the heavy rock in the way). Additionally, there is a bit of trickery with entering this dungeon that means the Surfing Bunny glitch will not work in it: In order to get past the first room of the dungeon, you must have pulled a switch in the Swamp Ruins in the Light World. Of course, if you use the Surfing Fairy glitch before doing this, the glitch will be cancelled by the time you enter the dungeon and you won't be able to get past the first room. And if you tried to pull the switch and then do the Surfing Bunny glitch, it would require you to leave the screen and reset the switch to its default 'off' position, setting you back to square one. For this reason, you need the Moon Pearl as well to complete this dungeon. Because you have to exit a dungeon and re-enter it to properly 'set' the dungeon to drop the correct Crystal once the boss is defeated, even the Exploration Glitch cannot help us here.

Skull Woods can be entered almost immediately with the Death Mountain Descent glitch, but since you need to use the Fire Rod on the overworld to access its second half, and bunny Link cannot use it, you'll need to be human to access it. If you tried to use the Surfing Bunny glitch to get into the second half of this dungeon, you'd find that there is a large black rock blocking the way back to the Village of Outcasts and Skull Woods, meaning you'd need to have the Titan's Mitt or Hookshot to get back to it (both of which require the Moon Pearl to collect anyway). Even by using the Exploration Glitch, you will get stuck in the unburnt bug if you try to leave and re-enter the second half of this dungeon, and there is nowhere in the first half of the dungeon to use the Exploration Glitch to safely explore the second half.

Thieves' Town is very similar to Skull Woods: For the same reasons, we cannot use the Surfing Bunny glitch to access it early, and since its entrance is blocked by a trident that we need to use human Link to pull off, we must have the Moon Pearl before entering it. Inside the dungeon, the only other item we really need are the Pegasus Boots and the Hammer. Note that if you complete this dungeon before Desert Palace, your Titan's Mitt will be downgraded to the Power Glove when you collect it, meaning you must then also complete the Turtle Rock before Desert Palace (As this are the only point in the game where the Titan's Mitt is absolutely required. You would also need to complete the Ice Palace between these dungeons if you weren't using the Exploration Glitch). Once again, trying to use the Exploration Glitch will just get you stuck in the trident when you try to exit and re-enter the dungeon.

Though the Ice Palace can be entered early with the Mirror Transition glitch, that only works in the Japanese 1.0 version of the game, and not on the SNES cartridge. Because of this, you'll need to use the Titan's Mitt to enter this dungeon. You can skip past the room where you'd normally need the Hookshot by using the explosion of a properly placed Bomb to throw you across the gap. Aside from that, you'll need to use the Hammer to get through the dungeon, and either the Fire Rod or the Bombos Medallion to destroy particular Freezors and the boss, Kholdstare. This means you must complete Skull Woods for the Fire Rod or collect the Master Sword (or use the Early Tempered Sword glitch) for the Bombos Medallion. With the Exploration Glitch, you can hop into a room in the first basement and work your way back to the entrance, but this would still require the Hammer and either the Fire Rod or the Bombos Medallion (but not the Titan's Mitt).

For Misery Mire, you can use a Dash Buffered Wall Clip to get into the Swamp of Evil without the Flute or Titan's Mitt, but this would require you to be able to use the Pegasus Boots while in the Dark World, meaning it would have to be after the Surfing Bunny glitch (which requires the Flippers, which requires the Power Glove or Titan's Mitt) or with the Moon Pearl. You can either use the Ether Medallion Glitch or the Early Tempered Sword glitch to get the Ether Medallion, and the gap in the first room that would normally require the Hookshot to cross can be crossed without it by letting a Bomb's explosion propel you past it. You could use the Exploration Glitch to access this dungeon, but it would still require the Ether Medallion to re-enter (and therefore either the Moon Pearl or Flippers to do the Surfing Bunny glitch, since bunny Link cannot use the Ether Medallion).

Turtle Rock could be glitched into with the Mirror Transition glitch in the Japanese 1.0 version as well, but in the SNES version, you must use the Titan's Mitt, which would require the Moon Pearl. Additionally, you'll need to use the Quake Medallion and the Hammer to get into the dungeon. Inside, it's theoretically possible to use the Levitation Glitch to cross the gaps in the floor without the Cane of Somaria, but to do so would require thousands of presses of the A button in a perfect rhythm of 60 times a second, making it essentially impossible without a turbo controller. In addition, you'll need to use the Fire Rod and Ice Rod to defeat the boss, Trinexx. There is no known way to use the Exploration Glitch to get through this dungeon early.

Ganon's Tower, on the other hand, can very easily be entered with the Exploration Glitch. The first room of this dungeon is hoppable, and you can exit and then re-enter the dungeon even without collecting the seven Crystals. In order to complete the dungeon, you only need to use the Fire Rod and either the Hammer or the Cane of Somaria (the part that normally requires the Hookshot can be passed with a few seconds of precise use of the Levitation Glitch, which is well within the realm of possibility of practiced speedrunners). Without using the Exploration Glitch, of course this requires you to have the seven Crystals from the Dark World dungeons.

FINAL RESULTS!
  • From the start -> Lower Hyrule Castle
  • After Lower Hyrule Castle -> East Palace, Mountain Tower, Upper Hyrule Castle
  • After East Palace -> Desert Palace, Dark Palace
  • After Mountain Tower -> Skull Woods
  • After Mountain Tower and Dark Palace -> Thieves' Town
  • After Dark Palace -> Ice Palace
  • After [Mountain Tower, Dark Palace, and Desert Palace] or Thieves' Town -> Swamp Palace
  • After [Desert Palace] or [Mountain Tower] -> Misery Mire
  • After Skull Woods, Thieves' Town, and Misery Mire -> Turtle Rock
  • After Skull Woods and [Dark Palace] or [Misery Mire] -> Ganon's Tower
    • NOTE: If you complete Thieves' Town before Desert Palace, you must also complete Turtle Rock before Desert Palace
 If we do not allow the Kiki Skip glitch or the Exploration Glitch (so we really crack down on the 'you cannot leave a dungeon after entering it unless absolutely necessary' rule), these are the possible dungeon orders:
  • From the start -> Lower Hyrule Castle
  • After Lower Hyrule Castle -> East Palace
  • After East Palace -> Desert Palace, Mountain Tower, Upper Hyrule Castle 
  • After Mountain Tower -> Skull Woods
  • After [Desert Palace] or [Upper Hyrule Castle] and Mountain Tower -> Dark Palace
  • After Dark Palace -> Thieves' Town
  • After Thieves' Town -> Ice Palace
  • After [Dark Palace and Desert Palace] or Thieves' Town -> Swamp Palace
  • After [Desert Palace] or [Mountain Tower] -> Misery Mire
  • After Skull Woods, Thieves' Town, and Misery Mire -> Turtle Rock
  • After Swamp Palace, Ice Palace and Turtle Rock -> Ganon's Tower
    • NOTE: If you complete Thieves' Town before Desert Palace, you must also complete the Ice Palace and Turtle Rock before Desert Palace

Sunday 5 April 2015

Dungeon Orders: Zelda II, The Adventure of Link (NES)

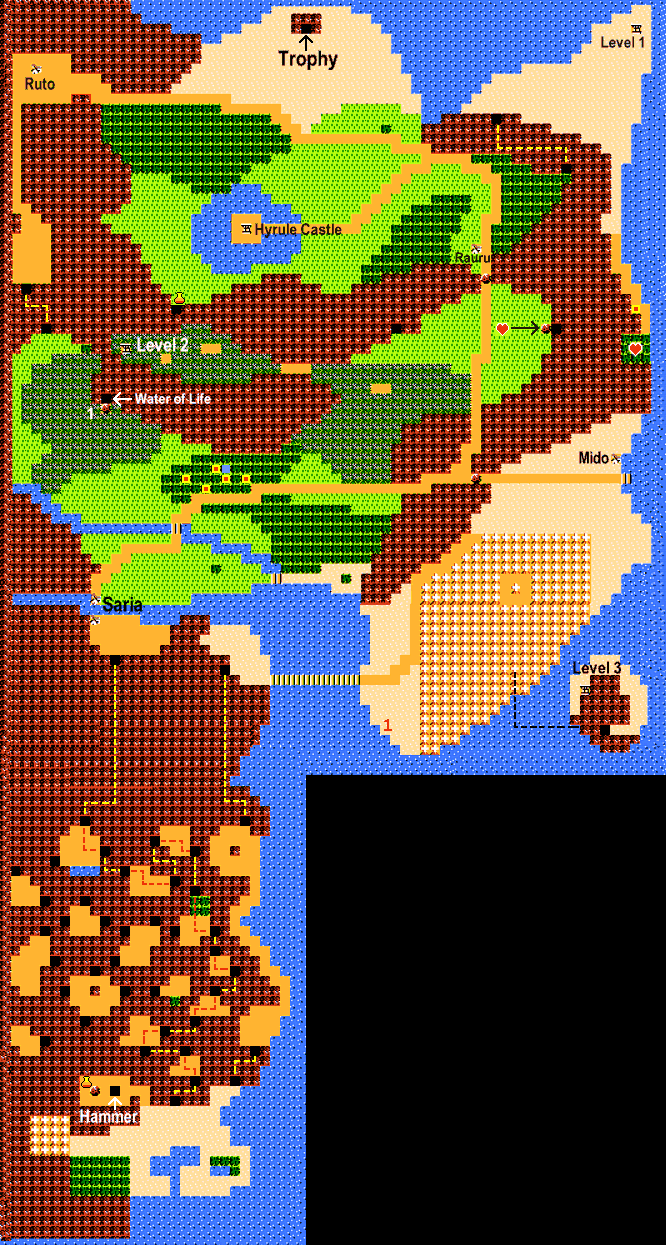
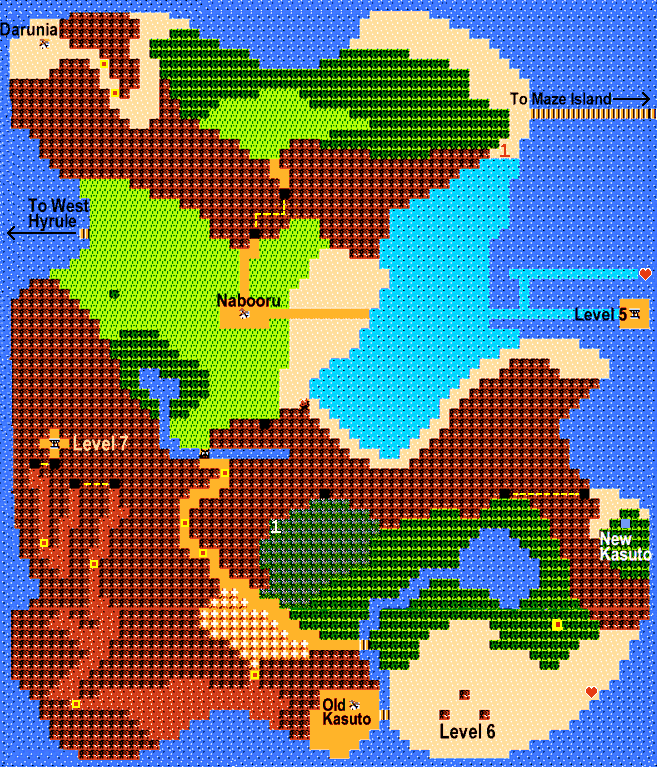
Zelda II is one of my favorite games in the series, as well as one of my favorite games of all time, and there is a lot to be said about it. Before getting into it, let's define what 'completing' a dungeon means in this game.

Fortunately, there are some really simple and obvious choices here. First, you must collect the main inventory item in the dungeon. Secondly, you must defeat the boss and/or mini-boss inside the dungeon (bosses and mini-bosses are defined as the enemies that drop Keys upon their defeat and cause the screen to stop scrolling until they are defeated). Thirdly, you must place the Crystal in the statue at the end of the dungeon. And finally, you must complete all three tasks without exiting and entering any other dungeon in between (this is to prevent you from taking an item from one dungeon and then heading off to use it to complete another). You do not have to collect any particular Keys, Magic Jars, or P-Bags within the dungeons to complete them in our definition. Conveniently, once a dungeon is 'completed' with these criteria, it turns into a mountain tile on the world map, preventing re-entry.  Of course, the definition of completing the Great Palace would include defeating Dark Link and collecting the Triforce of Courage instead of collecting an inventory item and placing a Crystal in the statue. Map images taken from http://www.kasuto.net

It's a bit harder to show you on a map, but using traditional gameplay, you *must* complete the dungeons in a specific order in this game.
  • Parapa Palace in the desert can be accessed immediately.
  • Midoro Palace in the swamp is blocked off from northwest Hyrule by a dark cave filled with enemies
  • Island Palace is to the south of the continent
  • Maze Palace is on Maze Island in northeast Hyrule, but this continent cannot be reached without the Raft
  • Ocean Palace is on a small island that can only be accessed with the Boots
  • Hidden Palace is in southeast Hyrule, but the dungeon will not appear until the Flute is played at the right place
  • The Great Palace is in southeast Hyrule, at the very end of the lava-filled Valley of Death
Now even though it's harder, you absolutely can get through the cave to southwest Hyrule without the Candle, which would let you enter Midoro Palace and Island Palace before entering any others. Of course, you obviously need the Raft to enter any of the dungeons in east Hyrule. Or do you?


GLITCH TIME!

So there are three closely related glitches in Zelda II that we're going to have to take a look at: The Healer Glitch, Glitch Town, and Scroll Lock.

THE HEALER GLITCH

Video composed by NMaster64 of various speedrunners.

What is happening is a bit hard to describe and does not appear to be entirely understood: Every type of NPC who opens a door in the game (it can be the women who let you come in to learn a new spell, the women who restore your magic, or the women who heal you, though most often the latter is used) has a walk cycle that involves them moving to the left for 224 frames, then to the right for 224 frames, repeated endlessly.

If you talk to one of these NPCS on exactly the 125th frame as she walks left, it triggers the first stage of this glitch. Then, if you talk to her exactly 18 frames later (the last frame before she opens the door), the game gets incredibly confused. Instead of opening the regular door that leads inside her house, the NPC will be facing the wrong direction and try to open the 'wall' as you'll see in the previous video (and climb non-existent stairs). This means that, instead of sending Link to the intended location of  'inside the house', the game doesn't know where exactly the door that is open is supposed to lead. And when Link is in a town and the game doesn't know where to put him, it sends him to Glitch Town.

GLITCH TOWN

Video taken from Joe Johnson's channel.

Aside from the Healer Glitch, which wasn't truly 'discovered' outside of tool-assisted speedruns until around 2012, there is one other very well-known way to access Glitch Town: If you're in Darunia and you cast the Jump Spell, you can get above the top of the screen by jumping off of the solid rooftops in that town. If you cast the Fairy Spell while you're off-screen, it'll warp you to Glitch Town. If you do it while in a dungeon, it will instead warp you back to the entrance of that dungeon, or to the entrance of Parapa Palace, depending on where you do the glitch.

Before explaining why Glitch Town is an important glitch, let's just note that it doesn't always end with you trapped in the water like at the end of the previous video. If you entered Glitch Town from Darunia or Nabooru and entered the first building of it, then that will happen, but entering it from other towns (only possible with the Healer Glitch) will warp you to much safer locations.
  • Rauru sends you to King's Tomb
  • Ruto sends you to mountain tiles south of Saria, forcing you to reset
  • Saria sends you to the Saria town on the other side of the river, by the entrance to Death Mountain
  • Mido sends you to Bagu's Hut
  • New Kasuto sends you to New Kasuto, conveniently enough
  • Darunia, Nabooru, and Old Kasuto (only possible with the Scroll Lock glitch) send you to the water tiles southwest of the Valley of Death, forcing you to reset
Now, Glitch Town is a very special town for a particular reason: If you enter the first open door in Glitch Town, it simply takes you back to Glitch Town instead of into an 'inside' position. This is very important because the game doesn't expect Link to enter a door so many times in a row without going outside (the most possible without glitching is twice, going inside in New Kasuto and from there, going inside the fireplace to where you learn the Spell Spell), so the game gets incredibly confused when you continue to enter doors when it's not programmed to expect that. Once you enter the Glitch Town door five times, the 'door entry' code overwrites some of the 'Link's position' code, creating the Scroll Lock glitch.

SCROLL LOCK AND WRONG WARPING

Video taken from Jerkwad152's channel.

Scroll Lock has a few interesting effects, some of which you can see in the video.
  • Whenever you enter a side-scrolling section (fixed encounter on the map, random enemy encounter, town, or dungeon) you will start on the far left side of the screen. This includes simply moving from screen to screen in towns, dungeons, or caves.
  • The screen will no longer scroll left while in a side-scrolling section. If you try to exit the screen to the left, it will warp you to a particular location (doing this is called a 'Wrong Warp').
    • If you're in a town, it will warp you to Glitch Town. Wrong Warping in Glitch Town will take you to the previously mentioned location for whichever town you entered.
    • If you're in a dungeon, it will take you to whatever room is left of your current room. If there is no room to the left, it will take you back to the dungeon's entrance.
    • In some fixed encounters or caves, it will take you to another specific location, depending on what fixed encounter you entered.
    • It will have no effect on random encounters, you simply leave the battle as normal.
  • You can no longer learn new spells or sword techniques. The knights and wise men who normally teach you these will not appear due to the Scroll Lock (While you can force them to appear under these conditions, it requires repeated pressing of left and right simultaneously, and is therefore impossible on an unmodified NES controller).
Wrong Warping can be incredibly useful, though limiting at the same time because you can't learn spells while under it. Not every fixed encounter leads to a new place, but these are the relevant ones that I know of.
  • The Death Mountain cave with the Magic Container sends you to a Maze Island fixed encounter location.
  • The Heart Container on a water tile in east Hyrule sends you to the cave east of the River Devil.
  • The cave east of the River Devil sends you to the southeast cave that links to New Kasuto, on the side with New Kasuto's forest.
  • The southeast cave connecting that part of Hyrule with New Kasuto sends you to the Great Palace.
  • The northeast cave that links Nabooru to the north forests of Hyrule sends you to the cave outside the swamp in southeast Hyrule.
  • The cave outside the swamp in southeast Hyrule sends you to the cave leading to the Great Palace.
  • The first cave in the Valley of Death sends you to the hidden P-Bag in the Valley of Death. The second cave in the Valley of Death sends you to this same point.
  • The last cave in the Valley of Death sends you to the first cave in the Valley of Death.
  • Any of the fixed encounters in the Valley of Death send you to the water tiles southeast of it, forcing you to reset. Entering these encounters from the right instead of the left gets you stuck in the wall, also forcing you to reset.
So as cool as Scroll Lock is, outside of dungeons it only has a few practical uses: Warping you from Rauru to King's Tomb, from Death Mountain to Maze Island, from northeast Hyrule to southeast Hyrule, and from southeast Hyrule straight to the Great Palace.

ANALYSIS

So let's look at each dungeon in particular to see its limitations. As we've seen, using the Scroll Lock glitch means we can access Parapa Palace, Midoro Palace, Island Palace, Maze Palace, and the Great Palace right away. Which of them can we complete immediately? Fortunately, this list is easier to compile than for most Zelda games, since the majority of dungeon items only affect the overworld.

Parapa Palace can obviously be completed with no special items, as it was designed to be the first location the player goes to. No special items are needed to complete it.

Midoro Palace can be accessed early with or without using Scroll Lock, and can be completed immediately, since the Candle from Parapa Palace does nothing in dungeons.

Island Palace can be entered immediately, but there is a solid wall of blocks between you and the Raft, and another between you and the boss. Since the Raft and the boss are both to the right of their respective rooms and the Scroll Lock only takes you to the extreme left of each room, even using that glitch won't allow you to complete this dungeon early. This means that you absolutely cannot complete this dungeon without the Handy Glove.

Maze Palace can be glitched into early with the Scroll Lock glitch, but the dungeon's boss, Carock, can only be defeated with the Reflect Spell. You learn this spell in Darunia, in northeast Hyrule, which you can only access with the Raft or a Wrong Warp. Since you can't learn spells while under the effects of Scroll Lock, you cannot complete this dungeon until you can enter eastern Hyrule without the Scroll Lock glitch, which means you must have the Raft.

Ocean Palace is located on a small island that has no other fixed encounters on it, which means there is absolutely no way to glitch onto it with Scroll Lock. The only way to access this dungeon is with the Boots.

Hidden Palace is in southeast Hyrule, but will not appear on the map until you have the Whistle, so you cannot possibly enter this dungeon without the Flute.

Great Palace can be entered with the Scroll Lock glitch, and you can use the dungeon Wrong Warp glitch to skip the binding force that would normally kill you if you try to get past it before placing all six crystals in the statues: Simply scroll the screen slightly to the right and then walk off-screen to the left to be placed in the room below the elevator. From there, you can mostly complete the dungeon as normal with only one small flaw: Because the screen is positioned slightly to the left while under Scroll Lock, the fight with Thunderbird will not trigger in the usual spot, but instead will start almost a full screen length to the right, when the pedestal you normally fight it on is almost entirely scrolled off-screen.
    First of all, this means you'll need to cast both the Jump Spell and the Thunder Spell to defeat Thunderbird, which requires level 7 magic or higher. Secondly, remember that in this game when a boss is defeated, a Key will drop into the center of the screen, and the screen will not scroll again until you pick that Key up. While under the effects of Scroll Lock, we'll be too far to the right to even see the Key fall, much less pick it up. This means that we're stuck in this room until we reset the game.
    There are certainly ways to finish the game while under Scroll Lock, but they all involve skipping the fight with Thunderbird, which goes against our 'defeat the boss' rule for completing a dungeon, so we cannot use Scroll Lock to glitch into the Great Palace early.

FINAL RESULTS!
  • From the start -> Parapa Palace, Midoro Palace
  • After Midoro Palace -> Island Palace
  • After Island Palace -> Maze Palace
  • After Maze Palace -> Ocean Palace
  • After Ocean Palace -> Hidden Palace
  • Last -> Great Palace

Friday 3 April 2015

Dungeon Orders: The Legend of Zelda (NES), Second Quest

We're going with the same rules as last time: To complete a dungeon, you must collect the inventory items from within it, defeat the boss enemy that drops a Heart Container, and collect the Triforce Shard. To complete the final dungeon, you simply have to collect the inventory items in it, defeat Ganon, and rescue Princess Zelda.

Let's now take a look at the Second Quest's overworld map, taken from http://www.nesmaps.com

Right-click the image to view its original, full size.
Since this map doesn't have a grid, you'll probably have to zoom in to see the dungeon locations.
  • The Letter E - The island in the center of the map, where The Eagle was in the First Quest
  • The Letter A - Under an Armos statue two screens left of The Letter E
  • The Letter L - Under a lake in the east forest, where The Moon was in the First Quest
  • The Letter D - Under a rock in the Lost Hills, north of the desert
  • The Letter Z - The island left of The Letter E, where The Snake was in the First Quest
  • The Junk Data - Under a grave in the west graveyard
  • The Inner Spiral - Under a tree in the east forest, three screens south of The Letter L
  • The Outer Spiral - Behind the rock wall along the north river, two screens left of The Letter D
  • Ganon's Skull - Behind the rock wall in the top left corner of the map
So the only dungeons we can enter immediately are The Letter E and The Letter A.
  • To access The Letter L, we need to use the Whistle to dry up the lake and create the dungeon entrance.
  • To access The Letter D, we need to use the Power Bracelet to push the rock.
  • To access The Letter Z, we need to use the Raft to reach the island.
  • To access The Junk Data, we need to use the Whistle to turn the grave into the dungeon entrance.
  • To access The Inner Spiral, we need to use a Candle to burn the tree.
  • To access The Outer Spiral, we need to use a Bomb to blow up the wall, and the Ladder to reach the wall across the river.
  • To access Ganon's Skull, we need to use a Bomb to blow up the wall.
Just like before, we can buy Bombs and the Blue Candle from overworld shops, and we can find the Power Bracelet in the northern mountains before entering any dungeons, so we can enter any dungeon immediately except The Letter L, The Letter Z, The Junk Data, and The Outer Spiral.

So we can already see that this quest is a lot more linear than the first one. As before, the Screen Wrap glitch won't help us here because we still cannot Screen Wrap onto the island with The Letter Z, Screen Wrapping is useless for trying to get to The Letter L or The Junk Data since those dungeon entrances don't exist until you play the Whistle, and there's no way to move down from the screen with The Outer Spiral to Screen Wrap into it without the Ladder.

ANALYSIS

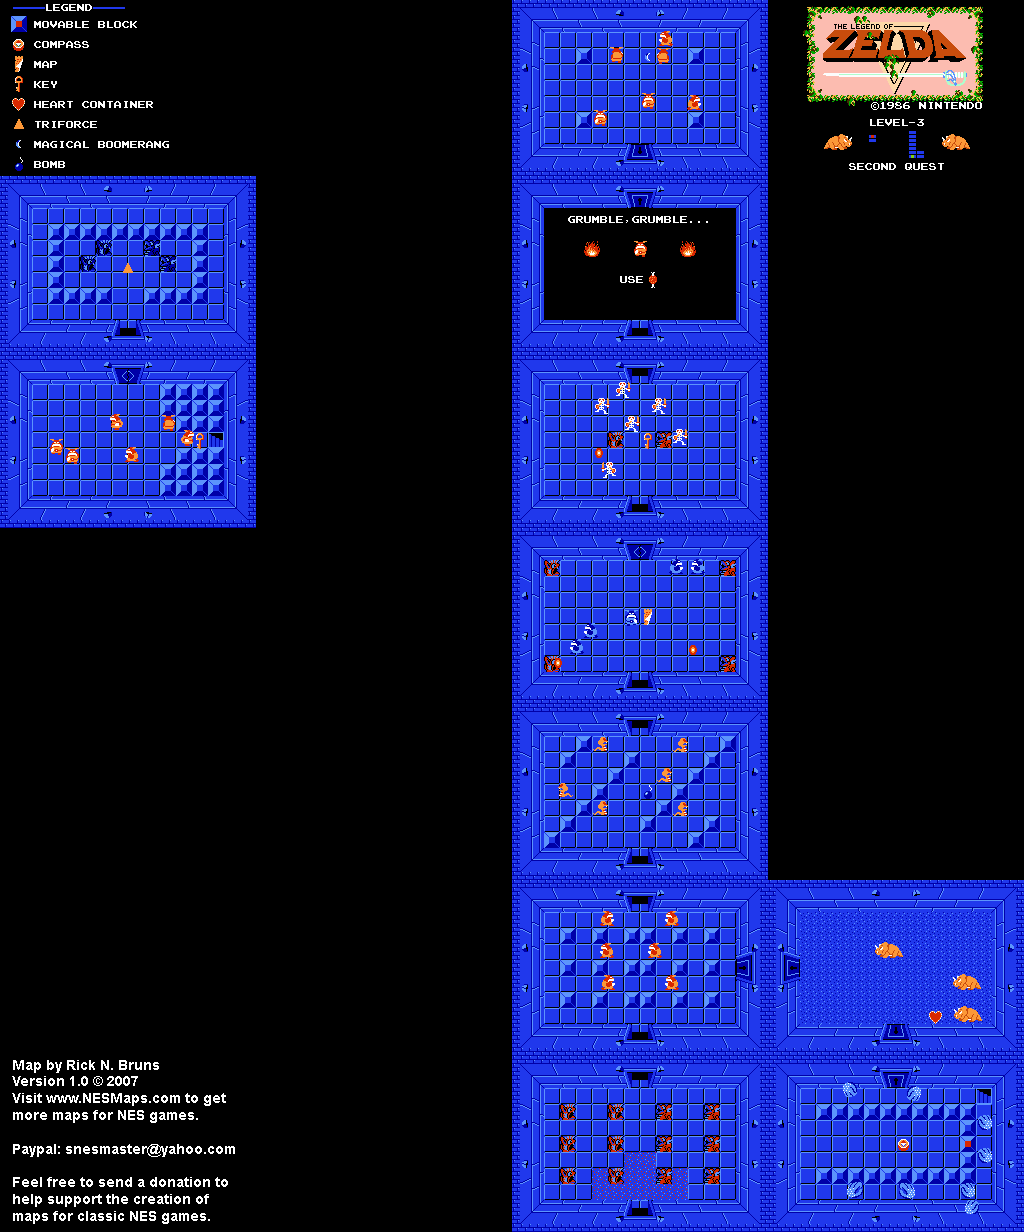
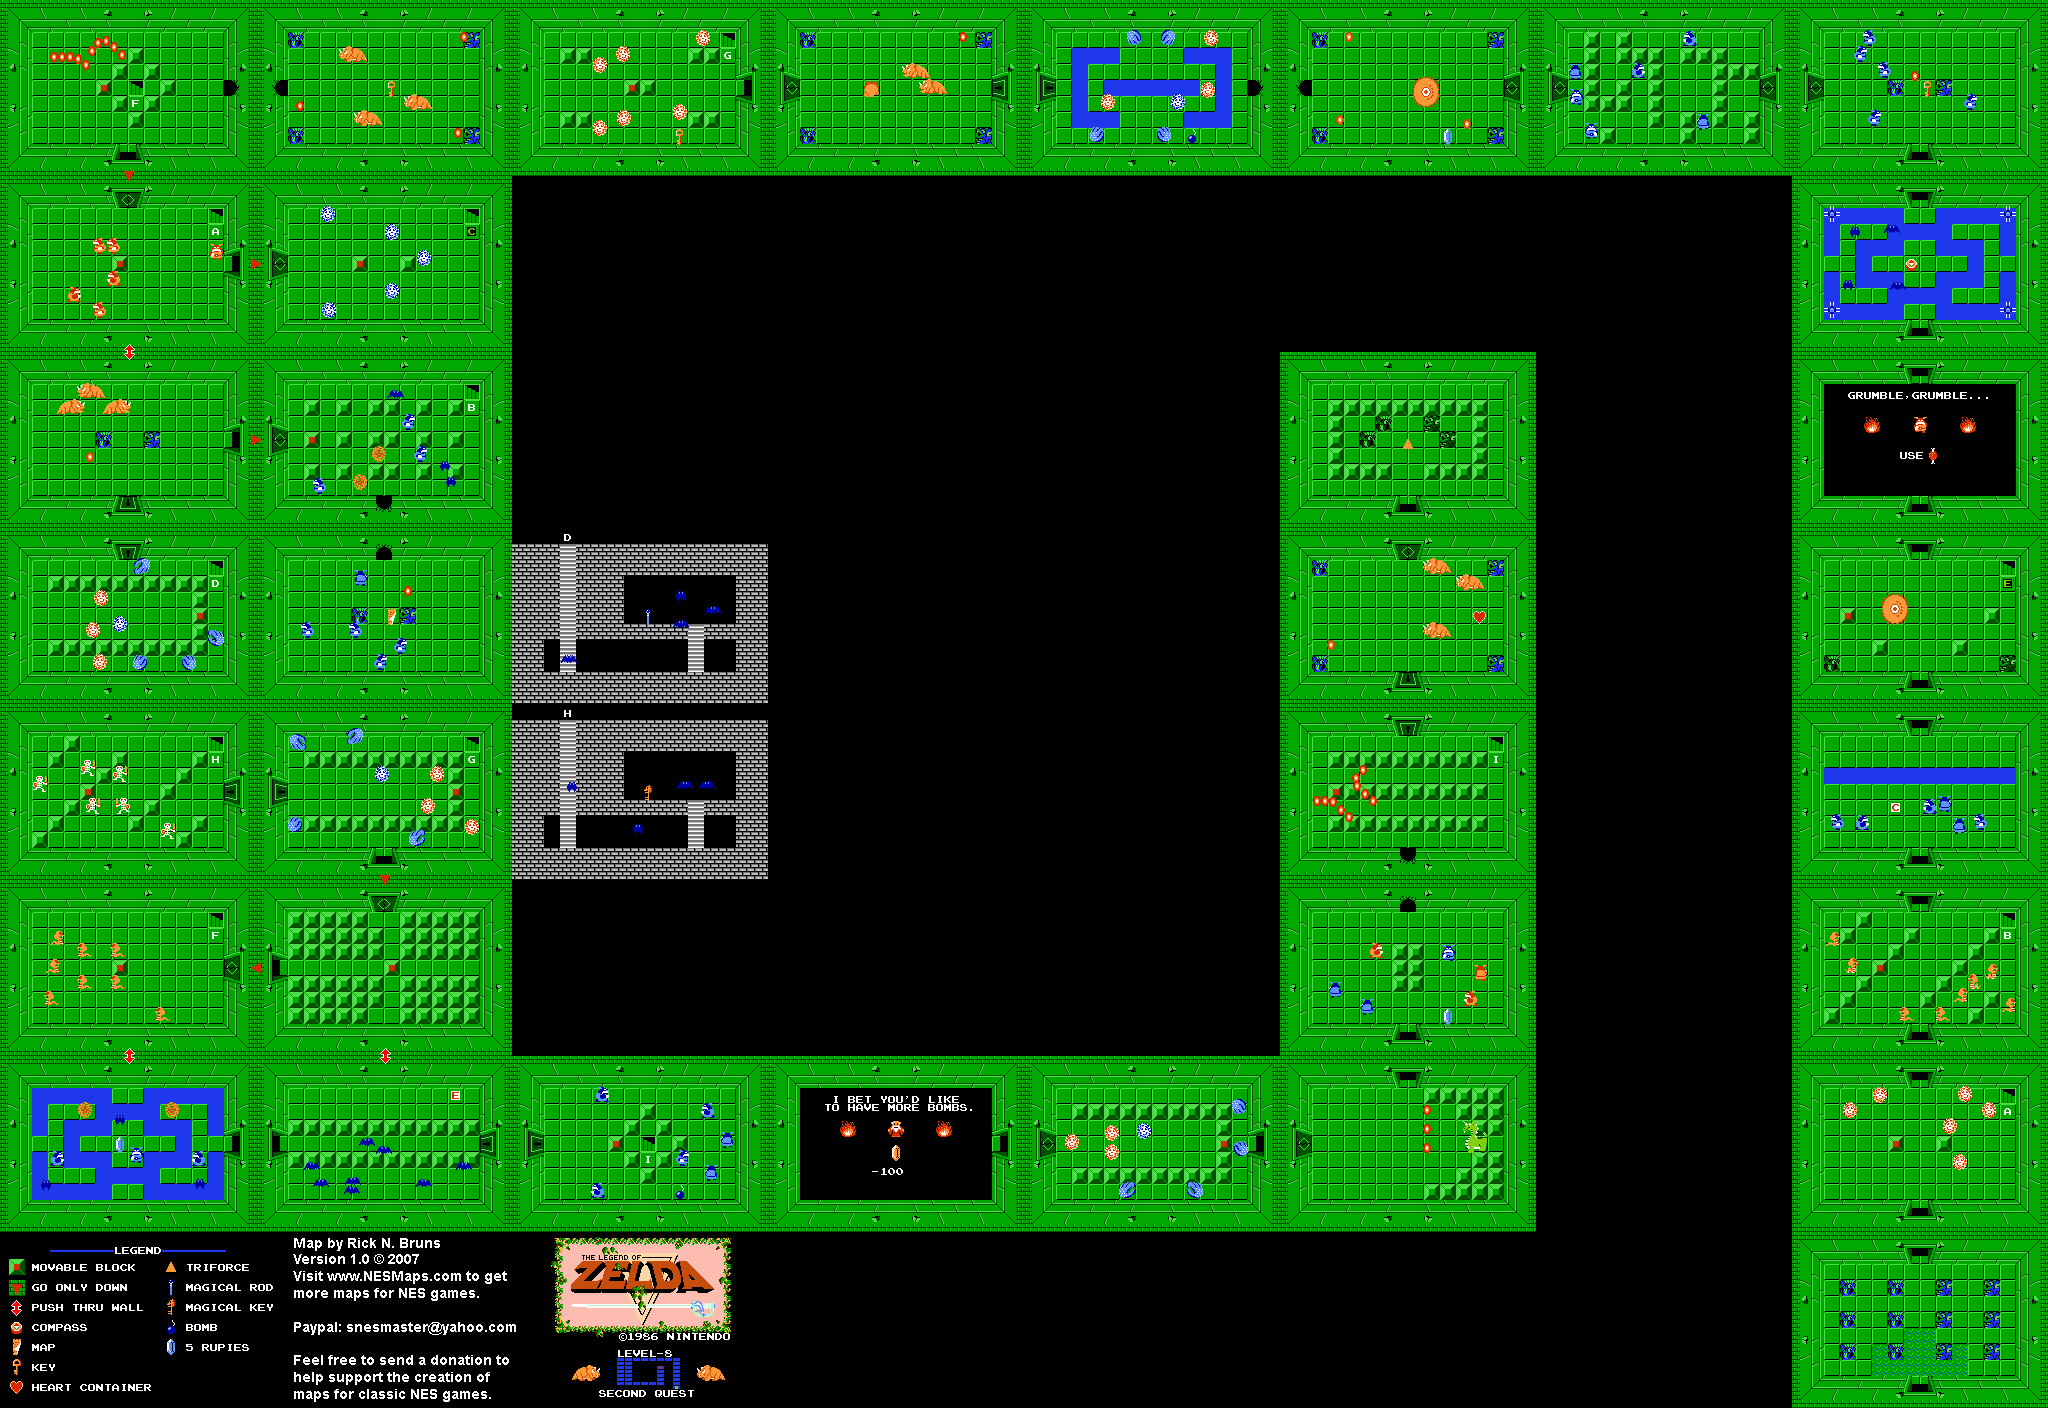
The following dungeon maps are all taken from http://www.nesmaps.com

This dungeon can be completed within two minutes with only a Sword and Bombs, since we don't have to worry about getting the Map or fighting the Dodongo mini-boss. Simply head right to get the Boomerang and focus on getting to Aquamentus, and the first Triforce Shard.

All we need here is a Sword, and we can ignore the Manhandla mini-boss if we wish. We can finish this dungeon with three extra keys without even fighting the mini-boss or bringing in Bombs to create shortcuts, which will be helpful in future dungeons.

We'll need to bring Bombs into this dungeon to defeat the Dodongo trio boss, and Bait to get at the Magical Boomerang. On the downside, we'll need to bring at least one spare Key into this dungeon in order to get to the Triforce Shard, but since we need the Whistle to access the dungeon anyway, we're bound to have an extra Key from The Letter A.

Immediately upon entering, we'll face a Digdogger blocking the way, and we'll need the Whistle to defeat it and progress into the dungeon. In order to collect the Book of Magic, we'll have to take out another Aquamentus. You'll also need some Bombs to take out a few Dodongos in the room before the Raft.

Aside from needed a Raft, you'll need to bring an extra Key into this dungeon as well: All of its Keys are behind locked doors or out of reach until you get the Ladder. Other than that, no special items are needed to get the Bow and defeat the Gleeok boss, though a Magical Shield may help.

You'll need Bombs to get through this dungeon, as well as (shockingly enough) an extra Key to reach the Ladder! Fortunately, since The Letter A had three spare Keys in it, no matter what order you do these last three dungeons in (since they all require the Whistle or an item inside a dungeon that requires the Whistle), you'll have enough Keys for them all. You'll also need the Bow and Arrow to defeat the boss, Gohma.

You'll virtually immediately need the Ladder to get through this dungeon, and you'll also need a Bow and Arrow to defeat a Blue Gohma blocking the way to the boss.

You'll need the Ladder to get through this dungeon, but will already have it by the time you're able to enter here anyway. You'll also need some Bait to get past another Hungry Moblin blocking the (long) path to the Magical Key. You'll have to either bring a spare Key into the dungeon or simply do some backtracking once you have the Magical Key in order to get the Magic Rod. Finally, you'll also need some extra Bombs to get to the Magical Key and to defeat the boss, another trio of Dodongos.

Much like before, you must have all of the eight Triforce Shards to get past the second room of this dungeon. Aside from that though, you can get the Silver Arrows with just Bombs and the Ladder, and can get to Ganon by bringing in either two extra Keys or the Magical Key. In any case, we would need the Bow and a Sword to defeat Ganon. This means if we could skip past the guard at the start of this dungeon, we'd only need to complete The Letter A, The Letter D, The Letter Z, and The Junk Data.

FINAL RESULTS!
  • From the start -> The Letter E, The Letter A
  • After The Letter A -> The Letter L, The Letter D
  • After The Letter D -> The Letter Z
  • After The Letter Z -> The Junk Data
  • After The Junk Data -> The Inner Spiral, The Outer Spiral
  • Last -> Ganon's Skull
As for some final notes...
  • Even though it wasn't required, we could collect the Map and Compass from every dungeon without changing the dungeon order. Only the following changes would be necessary:
    • We'd use one extra Key in The Snake, The Lizard, and The Letter E (though we'd still have enough Keys to complete each of those dungeons individually).
    • We'd need to defeat an extra Manhandla in The Lion.
    • We'd use two extra Keys in The Letter A, or one extra Key and Bombs (though defeating an optional Manhandla in the dungeon would replace that extra Key).
  • If we wanted to, we could purchase both Bomb upgrades in each quest. The only change is that it would require an extra Key in The Lizard (which would immediately replace itself in the next room) and an extra Key in The Demon (which we could use and still have enough Keys to complete the dungeon).

Thursday 2 April 2015

Dungeon Orders: The Legend of Zelda (NES), First Quest

Before we begin to check out the orders in which you can complete each dungeon, let's talk about what it means to 'complete' a dungeon.

In this game, a dungeon would be considered 'completed' if you've collected all of the inventory items from within it, defeated the boss of the dungeon, collected the Heart Container, and collected the Triforce Shard at the end of the dungeon. Of course, the case of Death Mountain, you would rescue Zelda instead of collecting a Heart Container or Triforce Shard. But this does mean that there are some things you don't have to do to complete a dungeon: You don't have to visit every room, collect any specific Keys, Rupees, Bombs, Maps, or Compasses. You don't have to defeat mini-bosses (defined as a boss-like enemy that does not drop a Heart Container), or purchase the Bomb upgrades. However, unless there is no possible way to do so, we're ruling that a dungeon must be completed in one trip: You cannot enter, grab an item from the dungeon, and then come back after using that item to complete three other dungeons!

So first, let's take a look at the First Quest map, taken from http://www.coolvideogamestuff.com

Right-click the image to view its original, full size.

The nine dungeons are located at the following locations on this map:
  • The Eagle - The island in the center of the map.
  • The Moon - The forest a few screens east of The Eagle.
  • The Manji - East of the brown forest in the south-west area of the map.
  • The Snake - The island west of The Eagle.
  • The Lizard - The mountains in the north-east area of the map.
  • The Dragon - East of the graveyard.
  • The Demon - Under the pond east of the graveyard, two screens south of The Dragon.
  • The Lion - Behind the tree in the middle of the eastern forest.
  • Death Mountain - Under the leftmost rock in the north-west area of the map.
So by following the map, before even getting the Wooden Sword, we can walk from the starting screen in the center of the southern edge of the map to The Eagle, The Moon, The Manji, The Lizard, and The Dragon.
  • To access The Snake, we need to use the Raft to reach the island.
  • To access The Demon, we need to use the Whistle to dry up the lake and create the dungeon entrance.
  • To access The Lion, we need to use a Candle to burn the tree.
  • To access Death Mountain, we need to use a Bomb to blow up the rock.
Of these items, we can buy the Blue Candle and Bombs from the overworld shops right away, so now the only dungeons we cannot enter immediately are The Snake and The Demon. But are we sure of that?

GLITCH TIME!
So let's take a look at a well-known glitch in the game, Screen Wrapping.

 Video taken from ZeldaSpeedRuns.

The Screen Wrap glitch lets you immediately cross from the left side of the screen to the right or vice versa. Though it's not shown in the video, you can also use it to cross from the top of the screen to the bottom, or from the bottom to top. Can we use this to access one of these dungeons early?

Since the entrance to The Demon doesn't even exist until the Whistle is used, Screen Wrapping will be of no help here. So let's take a closer look at the area around The Snake.

The left and right sides of that island are each one layer of water tiles followed by one layer of mountain tiles, neither of which Link can normally cross. What this means is if you Screen Wrap towards The Snake from the left or right, you'll be stuck behind the mountain tiles and unable to actually walk onto the island, and will have to reset your game. The north side of this screen is bordered by two mountain tiles as well, so Screen Wrapping from the screen above the island would have the same result (However, you can't actually Screen Wrap from that screen anyway! One step of Screen Wrapping up or down is to move left or right for one frame, and Link cannot move any distance left or right while on a staircase. Unfortunately, the only path up from that screen is a staircase).

So our last hope is Screen Wrapping up from the screen south of the island. Fortunately, you can use the Screen Wrap glitch from this screen! Unfortunately, instead of reappearing at the top of the screen, Link will just stand in place 'below' the bottom of the screen where you cannot see him (I'm not positive, but I imagine this has something to do with the game's internal flag for the dock on this screen). What this means is, no, there is no known way to access The Snake before getting the Raft.

In addition, Screen Wrapping cannot be used in dungeons for the same reason it cannot be used on staircases: The dungeon's doors are exactly wide enough for Link to cross through them, so you cannot move yourself up/down or left/right the tiny amount you need to in order to Screen Wrap.

So knowing that glitches will not be useful to us, let's take a look at what we'll need to complete each dungeon.

ANALYSIS

The following dungeon maps are all taken from http://www.nesmaps.com


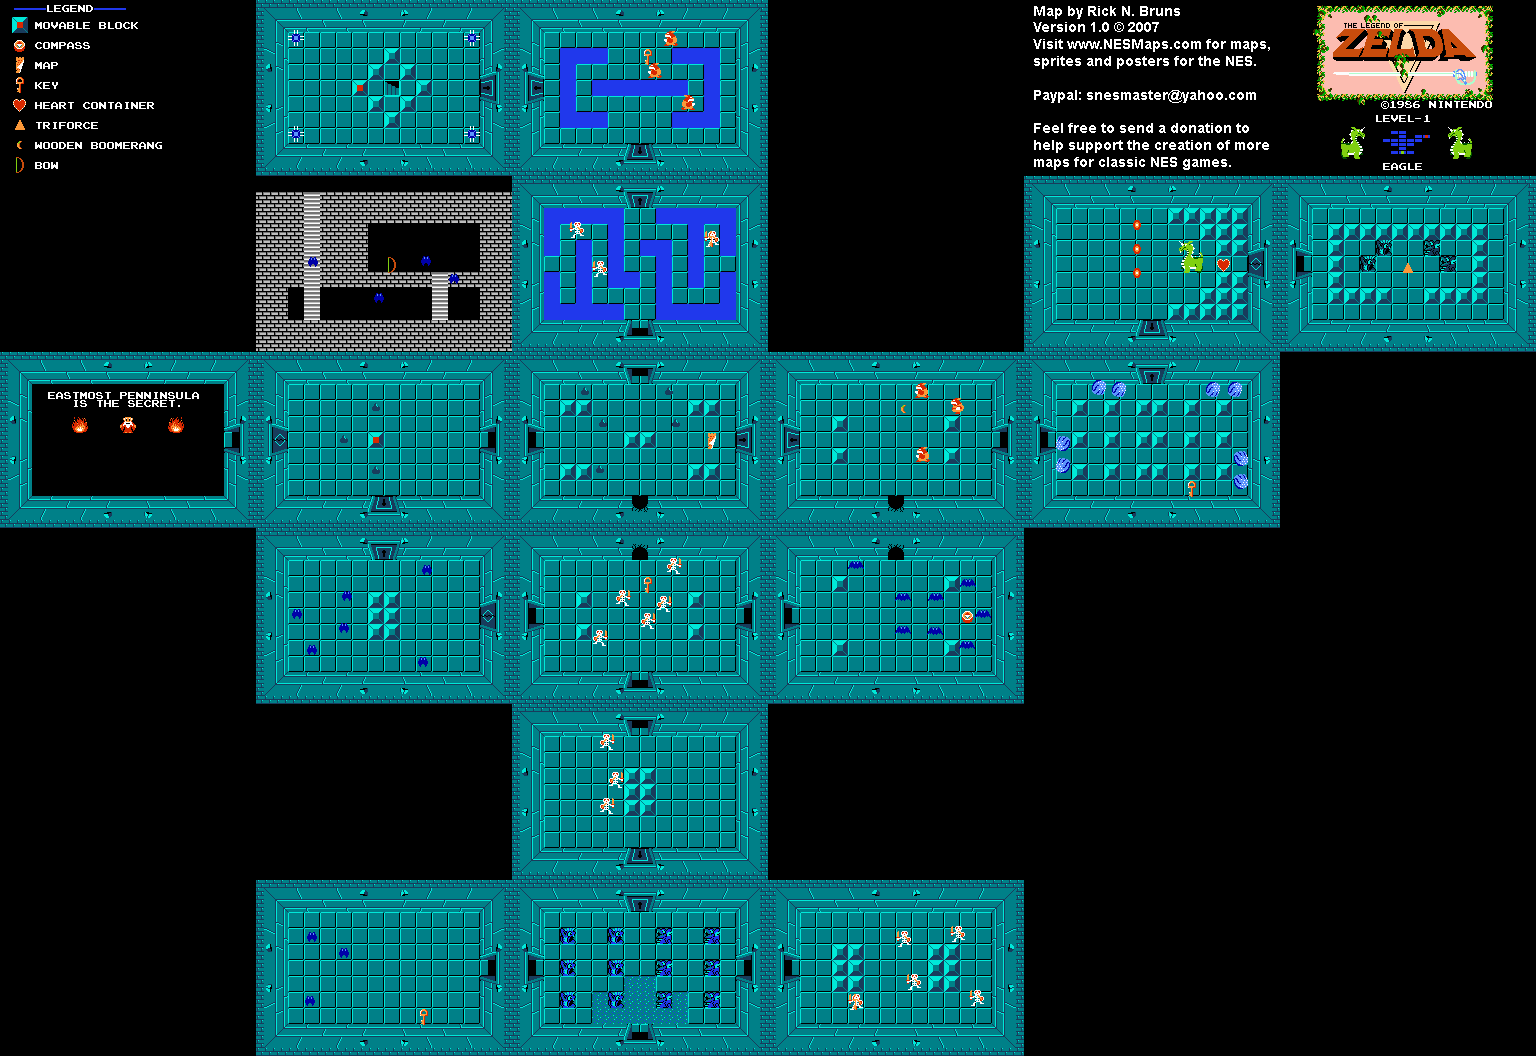
Aside from a Sword (or hell, even with a Candle and Bombs instead of a Sword, if you want), we don't need any special items to collect the Bow and the Boomerang, defeat Aquamentus, and collect the Heart Container and Triforce Shard. We could even easily pick up the Map and Compass if we wanted.


We just need some Bombs (to kill the boss, Dodongo) and a Sword to complete this dungeon, but we can find Bombs on the overworld and in shops. Collecting the Magical Boomerang, Heart Container, and Triforce Shard is easy here.

Bringing in Bombs or the White Sword would be helpful, but not needed. Just the Sword is required again to collect the Raft, defeat Manhandla, and collect the Heart Container and Triforce Shard.

Though we need the Raft to access this dungeon, we don't need any other items to complete it: The Blue Candle and Bombs might be helpful, but are unnecessary. With just the Sword, we can access the Ladder, and we can choose to fight the Manhandla mini-boss or just use the Bombs to go around it. We'll need to use the Sword to defeat Gleeok though, and collect its Heart Container and Triforce Shard.

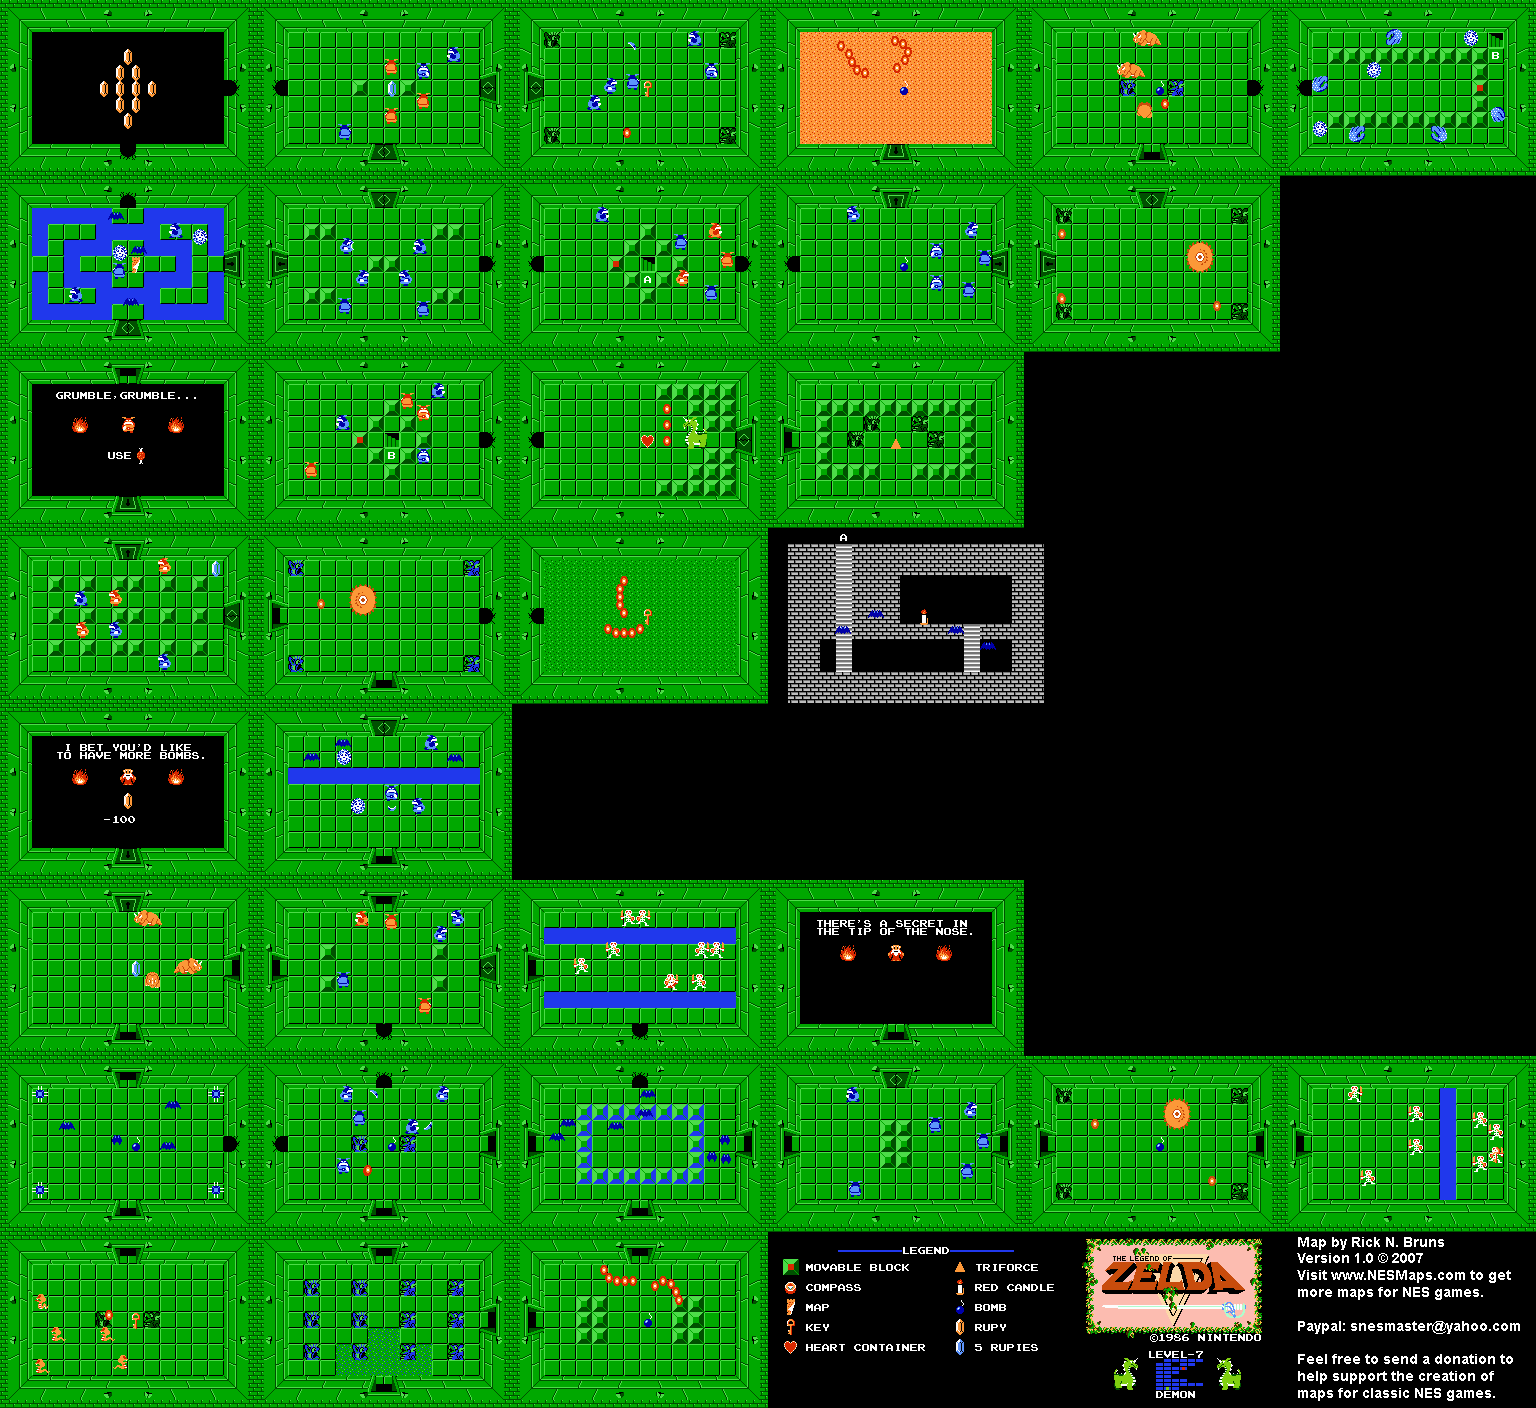
We need to bring in Bombs to collect the Whistle in this dungeon, and we'll need to use the Ladder to access the boss. We could collect the Bomb upgrade if we want, but there's no need to: We just need to defeat Digdogger and collect its Heart Container and Triforce Shard.

The Ladder is needed to reach the boss, and the Bow and Arrow are needed to defeat Gohma: No other weapon will affect it. Gleeok can be skipped though, with a bomb in the room beneath it. Fortunately, the Magic Rod can be collected without any other special items.

The Whistle is needed to access this dungeon, and Bombs are needed throughout it. Aside from that, you'll need to buy some Bait from the overworld to get past the hungry Goriya, and the Ladder to cross some rivers. Aside from using the Whistle to kill a Digdogger in your way, those are the only items needed to collect the Red Candle, defeat Aquamentus, and grab its spoils.

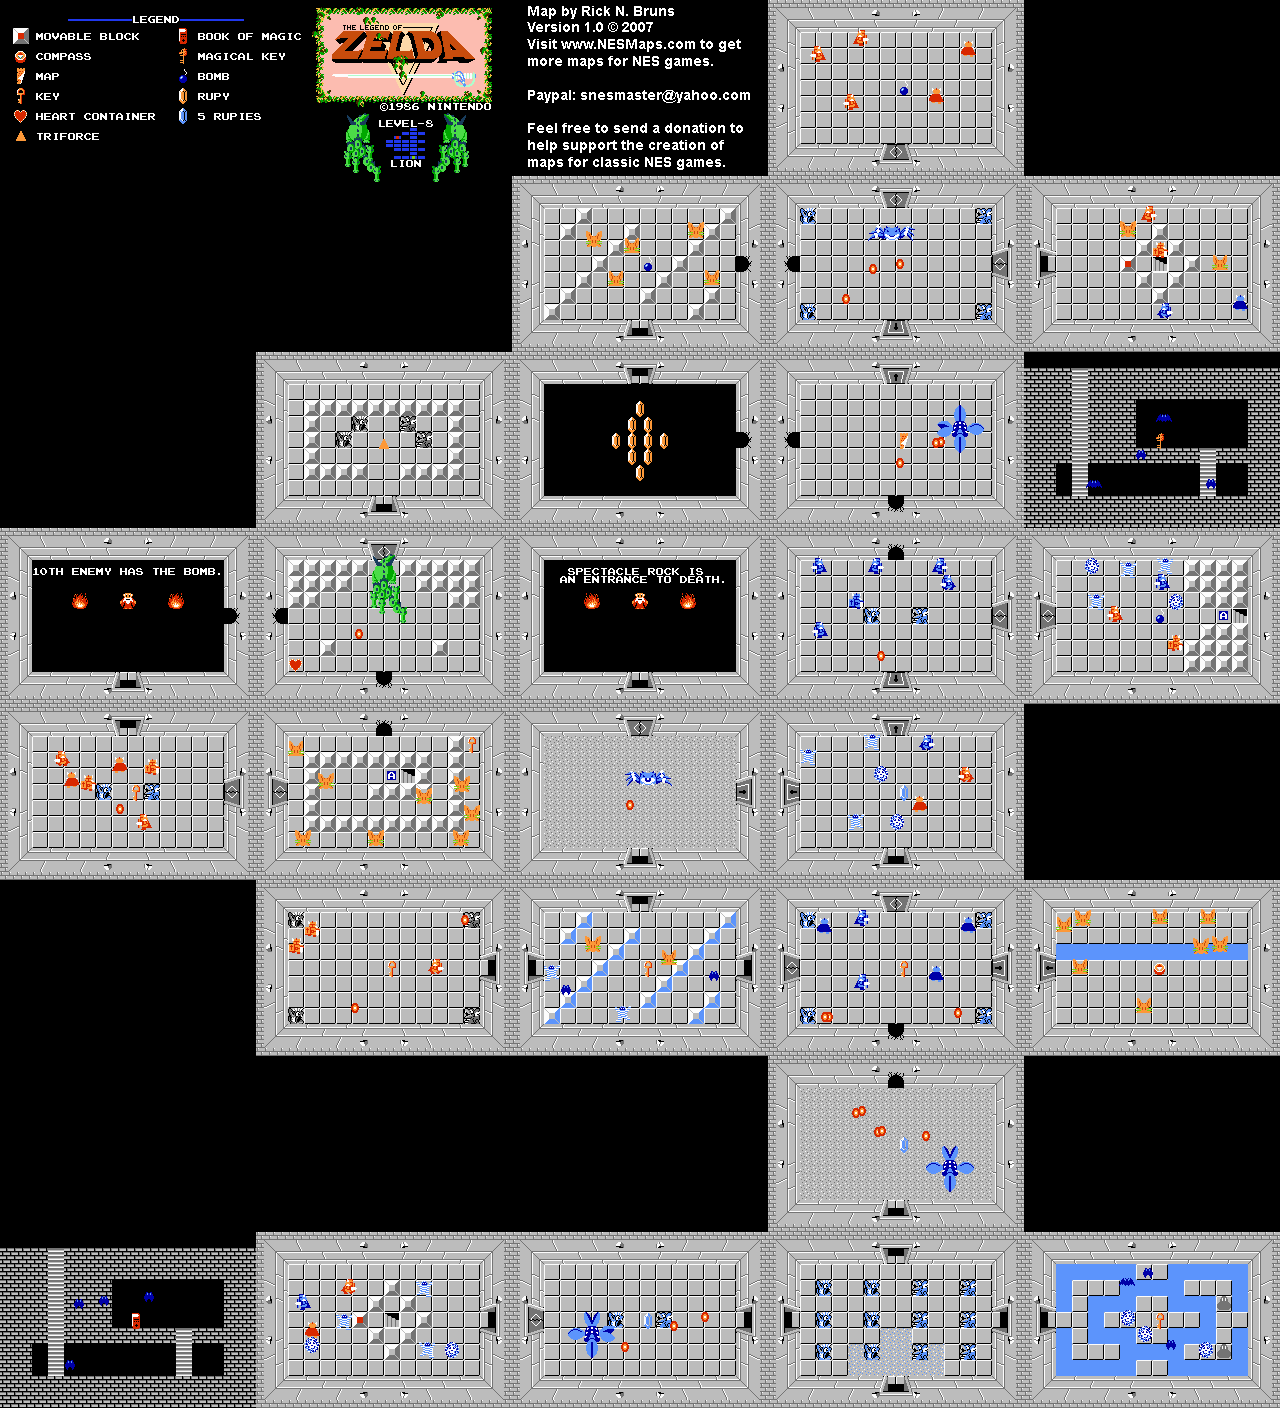
We just need a Candle to access this dungeon, though we will have to fight all three Manhandla mini-bosses to get all of the treasures in here. Also, we can easily grab the Book of Magic and get to the boss, Gleeok, right away to grab its Heart Container and Triforce Shard. The only issue is that a Blue Gohma is guarding the way to the Magical Key, so we'll need to bring a Bow and Arrow to defeat it.

An old man blocks the way into the dungeon, and won't let you pass its second room unless you have all eight Triforce Shards, forcing you to complete this dungeon last. Aside from that though, the only items we really need to use in this dungeon are Bombs (to blow open passages in certain walls), the Bow and Silver Arrow (to defeat Ganon), a Sword (to attack Ganon), and either two spare Keys or the Magical Key. With only those items, we could theoretically collect the Red Ring and Silver Arrows, defeat Ganon, and save Zelda, if only we could glitch into the main part of the dungeon early. So if we ever manage to get into this dungeon without all of the Triforce Shards, we'll only need to complete The Eagle for the Bow before finishing the game.

FINAL RESULTS!
  • From the start -> The Eagle, The Moon, The Manji
  • After The Eagle -> The Lion
  • After The Manji -> The Snake
  • After The Snake -> The Lizard
  • After The Lizard -> The Demon
  • After The Eagle and The Snake -> The Dragon
  • Last -> Death Mountain