We're going with the same rules as last time: To complete a dungeon, you must collect the inventory items from within it, defeat the boss enemy that drops a Heart Container, and collect the Triforce Shard. To complete the final dungeon, you simply have to collect the inventory items in it, defeat Ganon, and rescue Princess Zelda.
Let's now take a look at the Second Quest's overworld map, taken from
http://www.nesmaps.com
 |
| Right-click the image to view its original, full size. |
Since this map doesn't have a grid, you'll probably have to zoom in to see the dungeon locations.
- The Letter E - The island in the center of the map, where The Eagle was in the First Quest
- The Letter A - Under an Armos statue two screens left of The Letter E
- The Letter L - Under a lake in the east forest, where The Moon was in the First Quest
- The Letter D - Under a rock in the Lost Hills, north of the desert
- The Letter Z - The island left of The Letter E, where The Snake was in the First Quest
- The Junk Data - Under a grave in the west graveyard
- The Inner Spiral - Under a tree in the east forest, three screens south of The Letter L
- The Outer Spiral - Behind the rock wall along the north river, two screens left of The Letter D
- Ganon's Skull - Behind the rock wall in the top left corner of the map
So the only dungeons we can enter immediately are
The Letter E and
The Letter A.
- To access The Letter L, we need to use the Whistle to dry up the lake and create the dungeon entrance.
- To access The Letter D, we need to use the Power Bracelet to push the rock.
- To access The Letter Z, we need to use the Raft to reach the island.
- To access The Junk Data, we need to use the Whistle to turn the grave into the dungeon entrance.
- To access The Inner Spiral, we need to use a Candle to burn the tree.
- To access The Outer Spiral, we need to use a Bomb to blow up the wall, and the Ladder to reach the wall across the river.
- To access Ganon's Skull, we need to use a Bomb to blow up the wall.
Just like before, we can buy Bombs and the Blue Candle from overworld shops, and we can find the Power Bracelet in the northern mountains before entering any dungeons, so we can enter any dungeon immediately except
The Letter L,
The Letter Z,
The Junk Data, and
The Outer Spiral.
So we can already see that this quest is a lot more linear than the first one. As before, the Screen Wrap glitch won't help us here because we still cannot Screen Wrap onto the island with
The Letter Z, Screen Wrapping is useless for trying to get to
The Letter L or
The Junk Data since those dungeon entrances don't exist until you play the Whistle, and there's no way to move down from the screen with
The Outer Spiral to Screen Wrap into it without the Ladder.
ANALYSIS
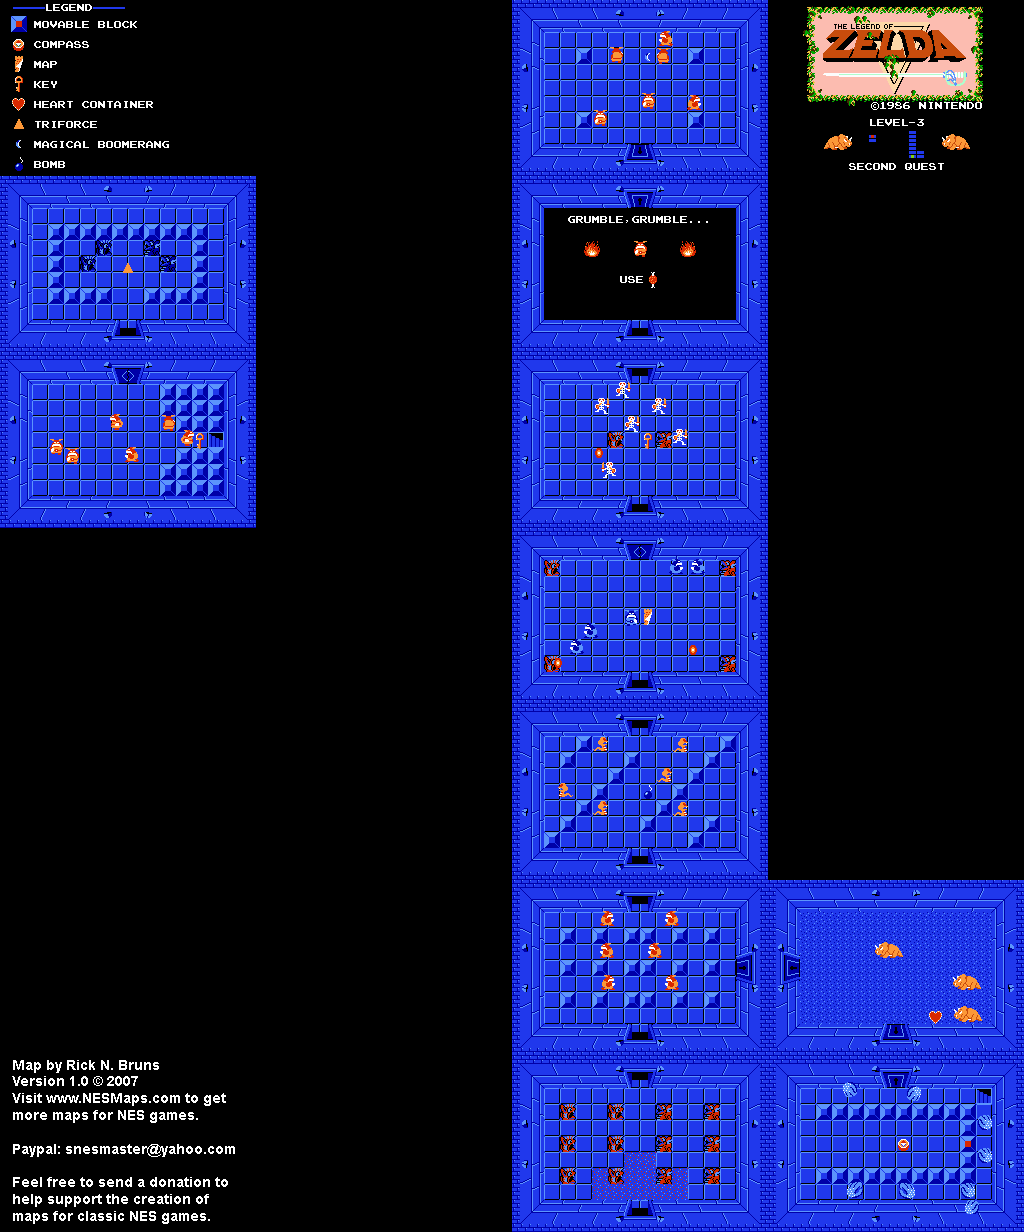
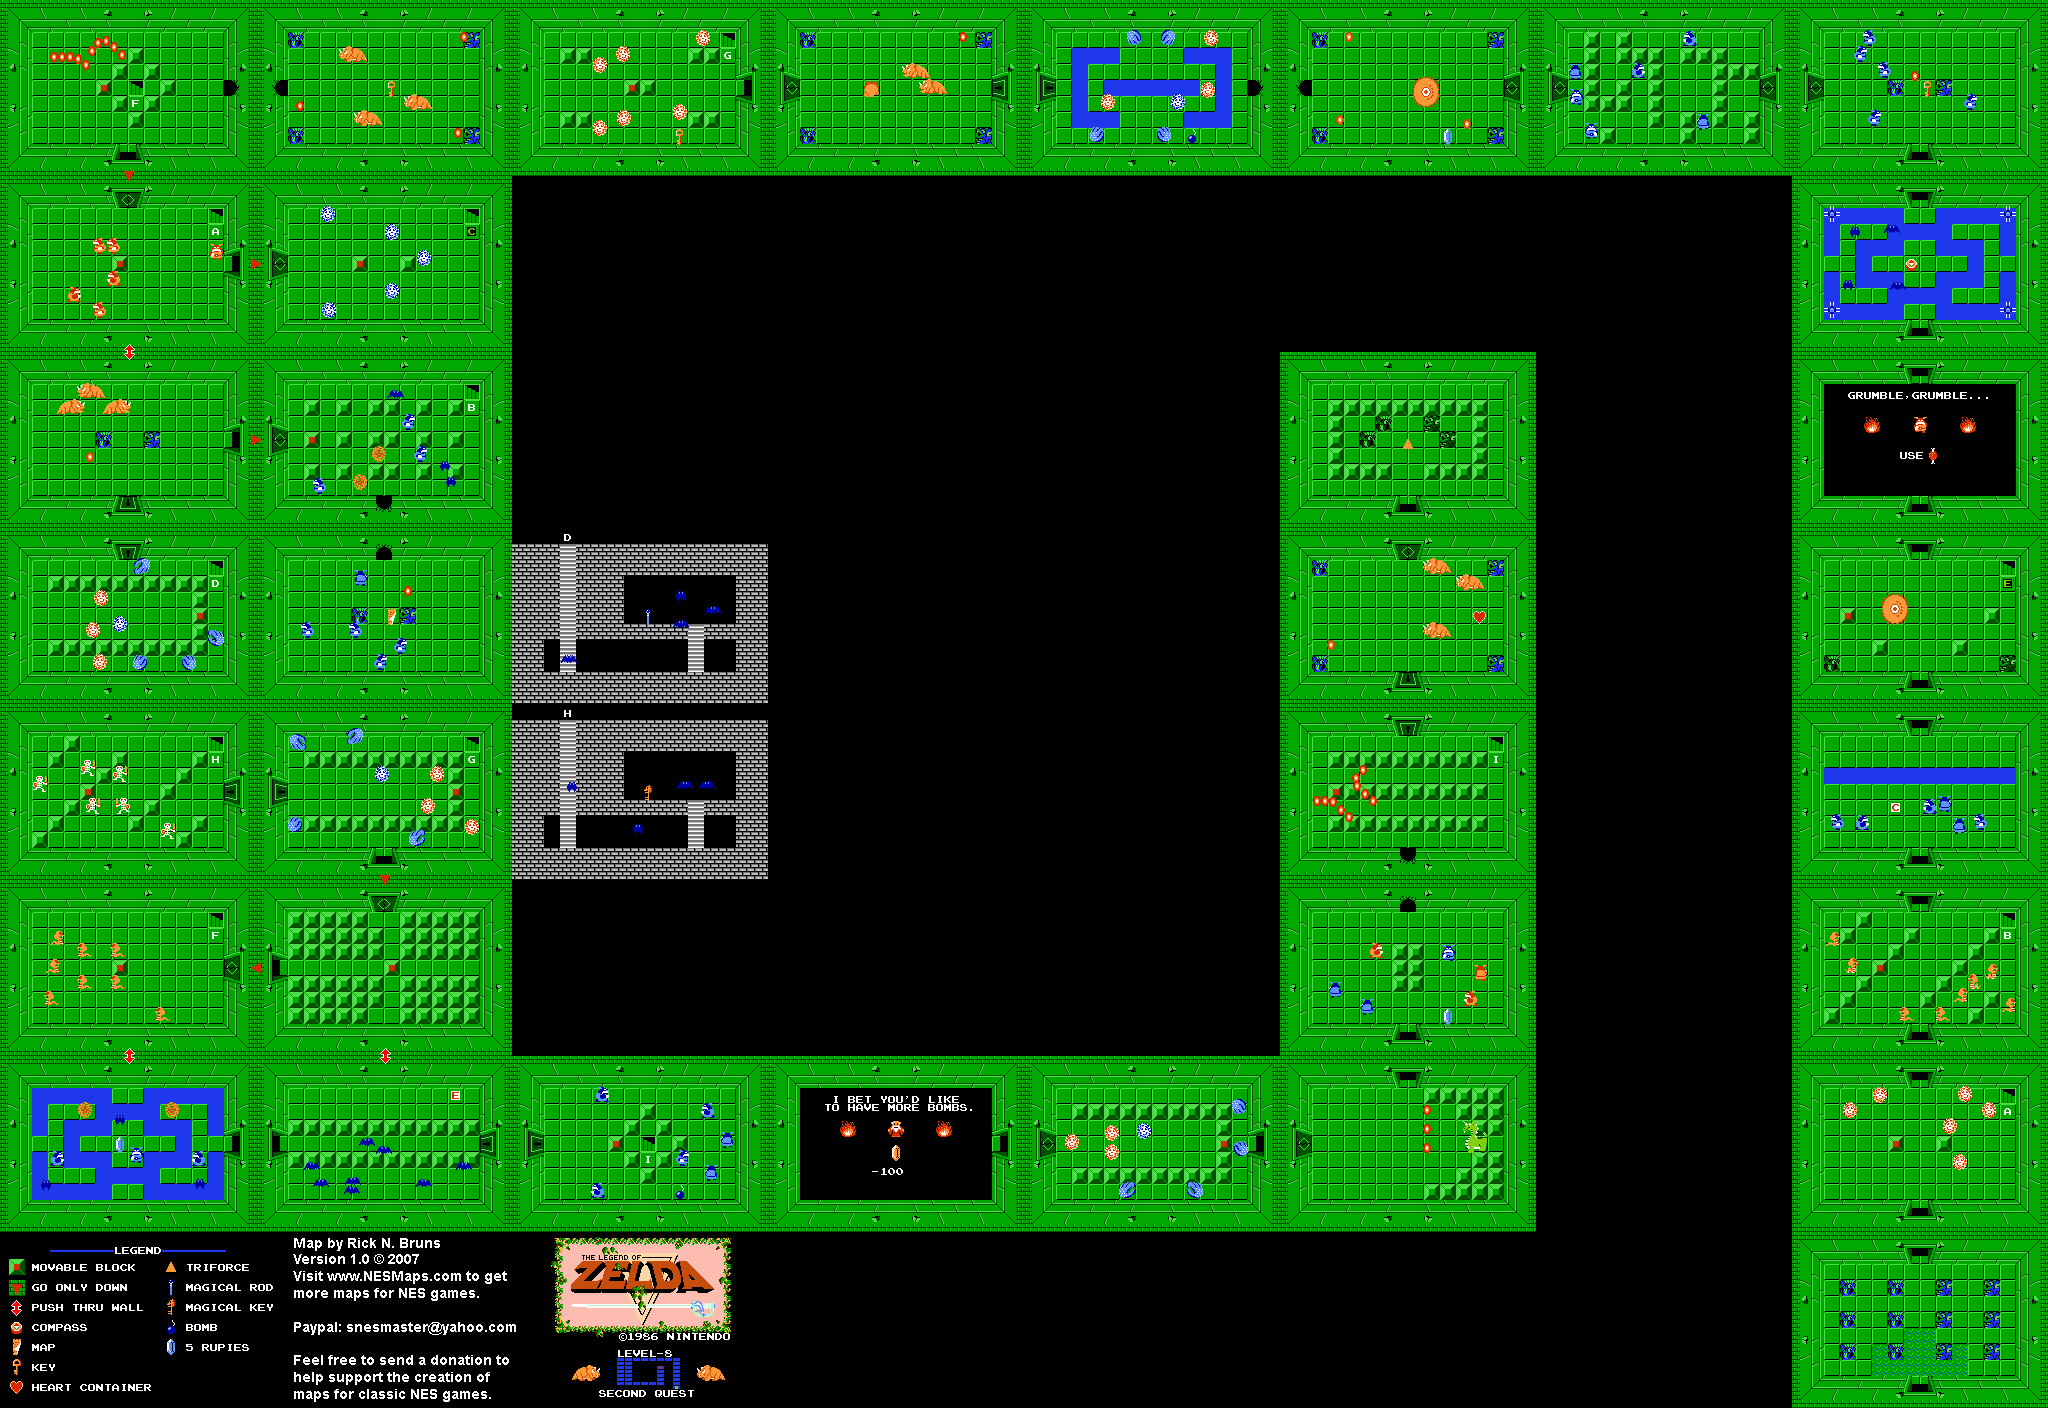
The following dungeon maps are all taken from
http://www.nesmaps.com
This dungeon can be completed within two minutes with only a Sword and Bombs, since we don't have to worry about getting the Map or fighting the Dodongo mini-boss. Simply head right to get the Boomerang and focus on getting to Aquamentus, and the first Triforce Shard.
All we need here is a Sword, and we can ignore the Manhandla mini-boss if we wish. We can finish this dungeon with three extra keys without even fighting the mini-boss or bringing in Bombs to create shortcuts, which will be helpful in future dungeons.
We'll need to bring Bombs into this dungeon to defeat the Dodongo trio boss, and Bait to get at the Magical Boomerang. On the downside, we'll need to bring at least one spare Key into this dungeon in order to get to the Triforce Shard, but since we need the Whistle to access the dungeon anyway, we're bound to have an extra Key from
The Letter A.
Immediately upon entering, we'll face a Digdogger blocking the way, and we'll need the Whistle to defeat it and progress into the dungeon. In order to collect the Book of Magic, we'll have to take out another Aquamentus. You'll also need some Bombs to take out a few Dodongos in the room before the Raft.
Aside from needed a Raft, you'll need to bring an extra Key into this dungeon as well: All of its Keys are behind locked doors or out of reach until you get the Ladder. Other than that, no special items are needed to get the Bow and defeat the Gleeok boss, though a Magical Shield may help.
You'll need Bombs to get through this dungeon, as well as (shockingly enough) an extra Key to reach the Ladder! Fortunately, since
The Letter A had three spare Keys in it, no matter what order you do these last three dungeons in (since they all require the Whistle or an item inside a dungeon that requires the Whistle), you'll have enough Keys for them all. You'll also need the Bow and Arrow to defeat the boss, Gohma.
You'll virtually immediately need the Ladder to get through this dungeon, and you'll also need a Bow and Arrow to defeat a Blue Gohma blocking the way to the boss.
You'll need the Ladder to get through this dungeon, but will already have it by the time you're able to enter here anyway. You'll also need some Bait to get past another Hungry Moblin blocking the (long) path to the Magical Key. You'll have to either bring a spare Key into the dungeon or simply do some backtracking once you have the Magical Key in order to get the Magic Rod. Finally, you'll also need some extra Bombs to get to the Magical Key and to defeat the boss, another trio of Dodongos.
Much like before, you must have all of the eight Triforce Shards to get past the second room of this dungeon. Aside from that though, you can get the Silver Arrows with just Bombs and the Ladder, and can get to Ganon by bringing in either two extra Keys or the Magical Key. In any case, we would need the Bow and a Sword to defeat Ganon. This means if we could skip past the guard at the start of this dungeon, we'd only need to complete
The Letter A,
The Letter D,
The Letter Z, and
The Junk Data.
FINAL RESULTS!
- From the start -> The Letter E, The Letter A
- After The Letter A -> The Letter L, The Letter D
- After The Letter D -> The Letter Z
- After The Letter Z -> The Junk Data
- After The Junk Data -> The Inner Spiral, The Outer Spiral
- Last -> Ganon's Skull
As for some final notes...
- Even though it wasn't required, we could collect the Map and Compass from every dungeon without changing the dungeon order. Only the following changes would be necessary:
- We'd use one extra Key in The Snake, The Lizard, and The Letter E (though we'd still have enough Keys to complete each of those dungeons individually).
- We'd need to defeat an extra Manhandla in The Lion.
- We'd use two extra Keys in The Letter A, or one extra Key and Bombs (though defeating an optional Manhandla in the dungeon would replace that extra Key).
- If we wanted to, we could purchase both Bomb upgrades in each quest. The only change is that it would require an extra Key in The Lizard (which would immediately replace itself in the next room) and an extra Key in The Demon (which we could use and still have enough Keys to complete the dungeon).


No comments:
Post a Comment